


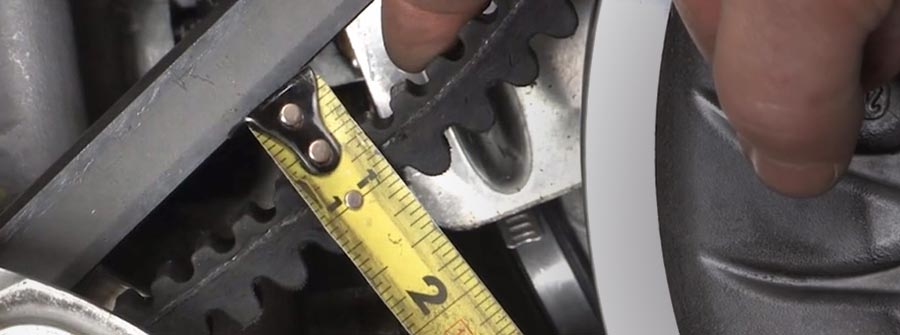
Correct motorcycle drive belt tension is important for smooth operation and for the life of the belt, pulleys, bearings, and related drivetrain components.

Why does belt tension matter?
- Too little tension can result in excessive belt movement, noise, slippage, heat, and premature belt or pulley wear.
- Too much tension can place excessive stress on the belt, bearings, shafts, pulleys, and related drivetrain components.
Quick answer: Measure belt deflection using the force, motorcycle position, measuring point, and loading conditions specified for your motorcycle. Compare the measured deflection with the specification for your exact model and year before making an adjustment.
Inspection intervals also vary by motorcycle. Some maintenance schedules call for an initial belt check after a break-in period and subsequent periodic inspections. Always follow the maintenance schedule in the service manual for your exact motorcycle.
How to Check Motorcycle Drive Belt Tension
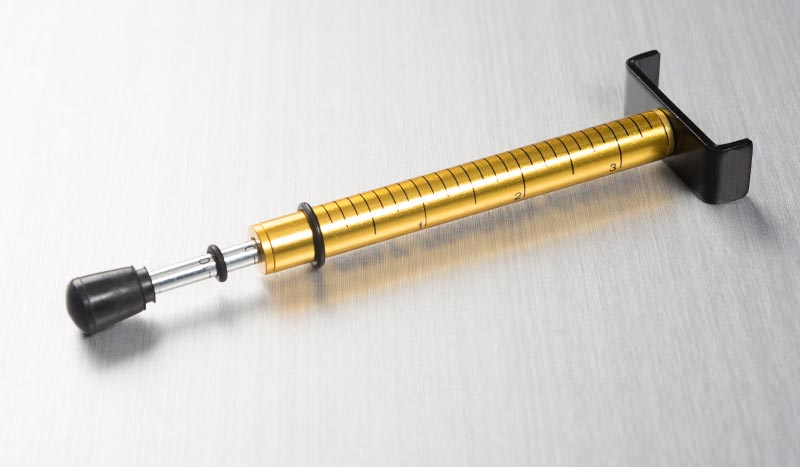
To check drive belt deflection accurately, you will need a suitable belt tension gauge.
If your motorcycle specifies a 10-lb measuring force, you can use the KiWAV Belt Tension Gauge.
Before Measuring
Check the service manual for your motorcycle before beginning. Confirm:
- The required measuring force
- The specified belt deflection range
- The correct measurement point
- The required motorcycle position
- Whether the motorcycle should be loaded or unloaded
- Any specified belt temperature or other measurement condition
Do not assume that the same measurement procedure applies to every belt-driven motorcycle.
Using a 10-lb Belt Tension Gauge
- Position the motorcycle as specified by the manufacturer.
- Put the transmission in neutral if required by the service procedure.
- Allow the motorcycle and drive belt to reach the specified measurement condition.
- Remove rider, passenger, or cargo load if the manufacturer's procedure specifies an unloaded motorcycle.
- Follow any additional safety preparation specified in the service manual.
- Slide the small O-ring on the gauge to the 10-lb mark.
- Place the gauge squarely against the belt at the specified measuring point and keep it at a 90-degree angle to the belt surface.
- Push against the belt until the small O-ring reaches the tool body.
- Measure the resulting belt deflection.
- Compare the measurement with the specification for your exact motorcycle.
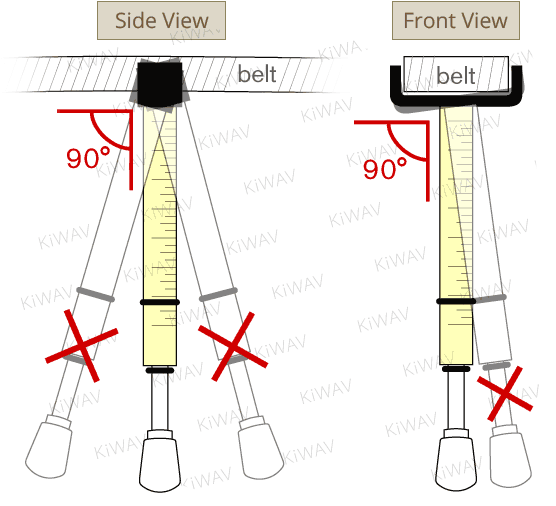
For detailed instructions on reading the KiWAV gauge itself, see the KiWAV Belt Tension Gauge User Guide.
Belt Tension Deflection Reference Table
The following specifications are provided as a quick reference based on applications previously documented by KiWAV.
Important: Belt tension specifications can vary by model year, suspension configuration, market, and measurement condition. Before adjusting your motorcycle, verify the specification in the OEM service manual for your exact model and year. If the service manual differs from the table below, always follow the service manual.
| Brand | Model / Configuration | Force | Deflection | OEM Gauge Part # |
|---|---|---|---|---|
| Harley-Davidson | All except FLHX/S, FLTRX/S and Low models Standard shock absorbers | 10 lb | 3/8"–9/16" (9.5–14.3 mm) | HD-35381-A |
| Harley-Davidson | FLHX/S, FLTRX/S and Low models Low-profile shock absorbers | 10 lb | 1/4"–7/16" (6.4–11.1 mm) | HD-35381-A |
| Harley-Davidson | Sportster | 10 lb | 1/4"–5/16" (6.4–7.9 mm) | HD-35381-A |
| Harley-Davidson | XG 500 / XG 750 | 10 lb | 1/2" (12.72 mm) | HD-35381-A |
| Indian | Scout | 10 lb | 0.472" (12 mm) ±0.5 mm | PV-43532 |
| Triumph | Thunderbird | 10 lb | On side stand: 5.5–7.0 mm (0.20–0.27 in) On support stand T3880803: 7.5–9.0 mm (0.30–0.35 in) | T3880126 |
| Victory | Octane | 10 lb | 0.472" (12 mm) ±0.5 mm | PV-43532 |
| Victory | Vegas | 10 lb | 0.472" (12 mm) ±0.5 mm | PV-43532 |
Reference only: Always verify the correct deflection, force, motorcycle position, and measurement procedure for your exact motorcycle and model year.
How to Adjust Motorcycle Drive Belt Tension
If the measured deflection is outside the specified range, the drive belt may require adjustment.
The adjustment procedure varies between motorcycles. Depending on the design, it may involve:
- Rear axle position
- Axle adjusters
- Eccentric adjusters
- Rear-wheel alignment
- Specified axle and adjuster torque
Follow the service manual for the adjustment procedure and torque specifications for your exact motorcycle.
After adjustment, check belt deflection again under the same specified conditions and verify that the final measurement is within specification.
Using the KiWAV Belt Tension Gauge
The KiWAV belt tension gauge is designed for applications that specify a 10-lb measuring force. It uses a movable O-ring and graduated scale to help measure drive-belt deflection consistently.
For the tool-specific A/B reading procedure, see the KiWAV Belt Tension Gauge User Guide.
Shop the KiWAV Belt Tension Gauge
Final Check
- Confirm that belt deflection is within specification.
- Check rear-wheel alignment if required by the service procedure.
- Make sure adjusted fasteners are tightened to the manufacturer's specified torque.
- Inspect the belt and pulleys for visible damage or abnormal wear.
- Recheck the measurement after adjustment if required by the service procedure.
If belt tension repeatedly moves outside specification, or if you notice abnormal belt wear, noise, damage, or tracking, diagnose the underlying cause rather than repeatedly adjusting tension alone.
Subscribe
There are many practical motorcycle tools that make maintenance jobs easier.
If you're interested, subscribe to KiWAV for new technical guides, tools, and product updates.