The Complete Guide to Installing Motorcycle Handlebar Mirrors
The Complete Guide to Installing Motorcycle Handlebar Mirrors
Details
Written by: KiWAV
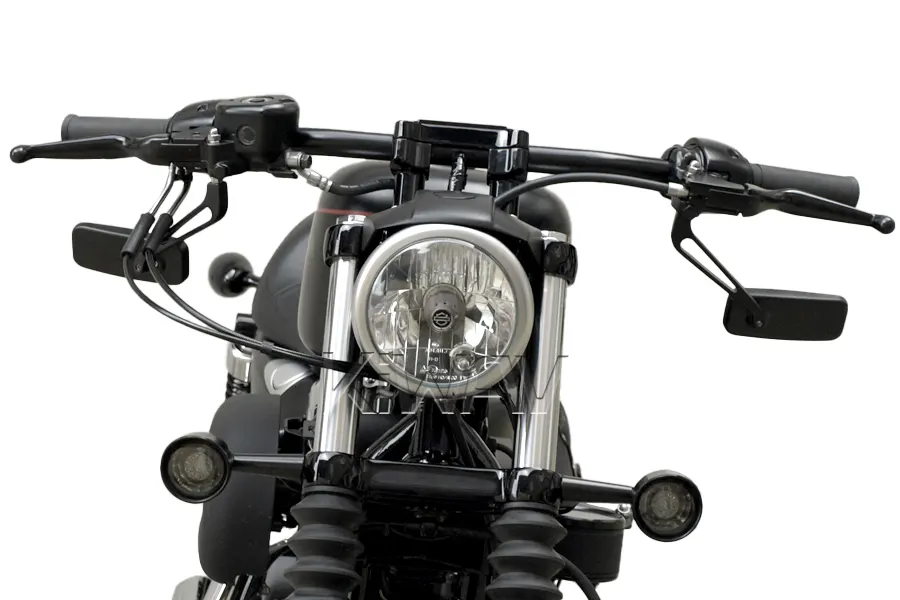
Handlebar-mounted mirrors are the standard for most motorcycles, offering intuitive positioning and legal compliance. However, achieving a stable, vibration-free setup requires matching the correct hardware to your bike's specific mounting system.
This guide covers everything from perch-mount to bolt-through systems, helping you identify your setup and install your mirrors safely.
Quick Answer: How Do You Install Handlebar Mirrors?
Installing handlebar mirrors typically involves four steps:
Confirming steering and lever clearance
Identifying your bike's mounting system
Selecting the adapter or bolt with correct thread direction and size
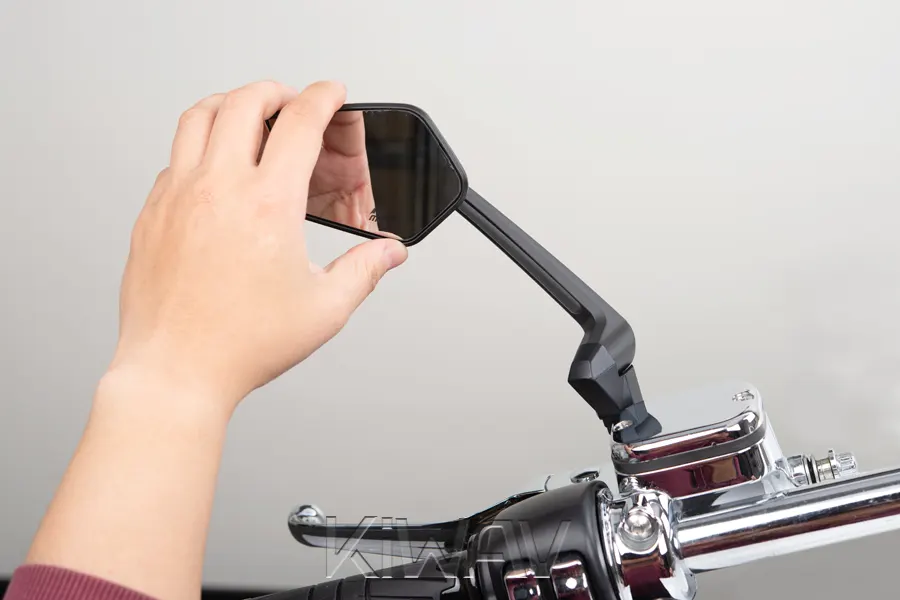
Adjust mirror angle and tighten to the correct torque
Identify Your Mirror and Bike Interface
Before installation, you must match your mirror's "Connection Type" to your motorcycle's "Mounting System.”
1. Identify Your Mirror Connection (The "Mirror End")
Look at the bottom of your mirror stem. Which of these three does it have?
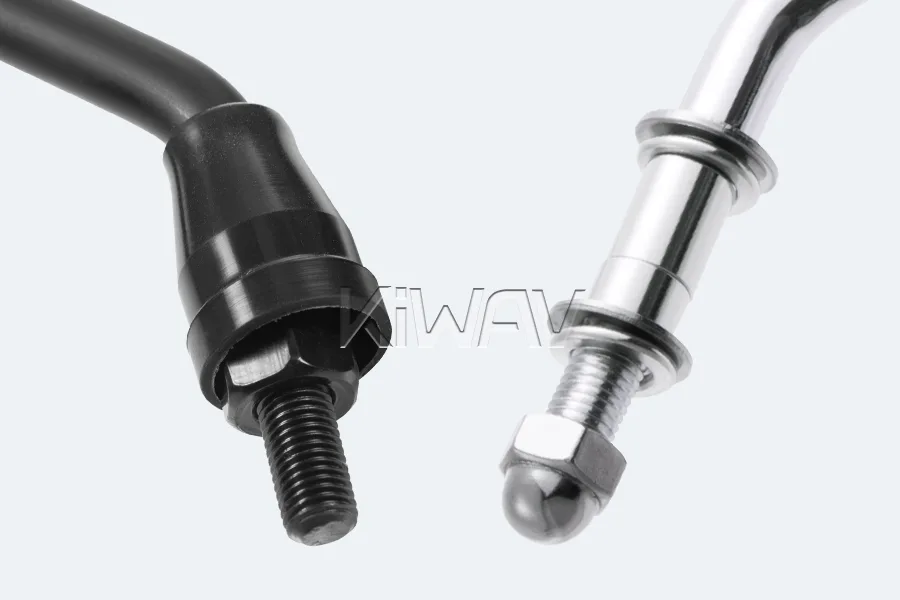
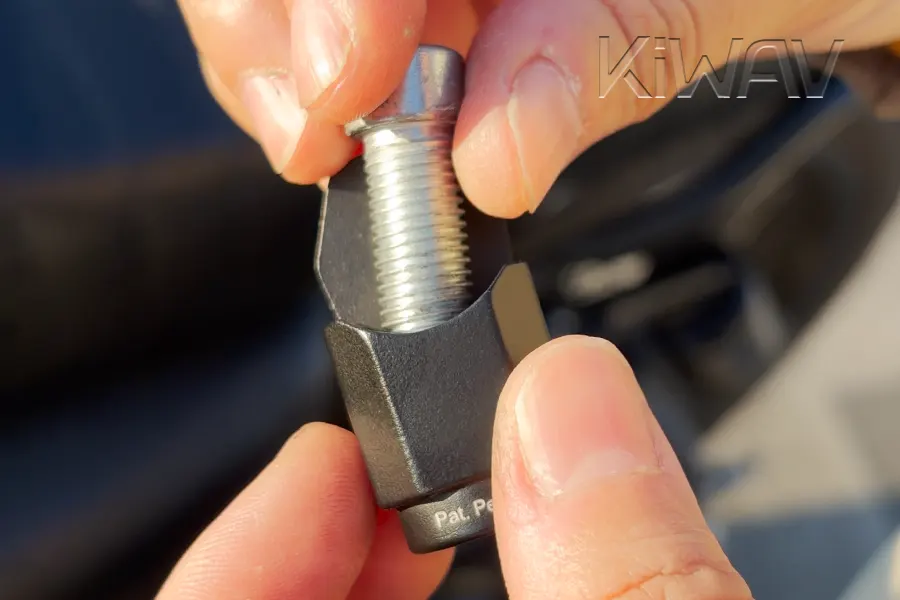
Type 1: Threaded Stud (Male)
The mirror has a threaded stud built into the stem.
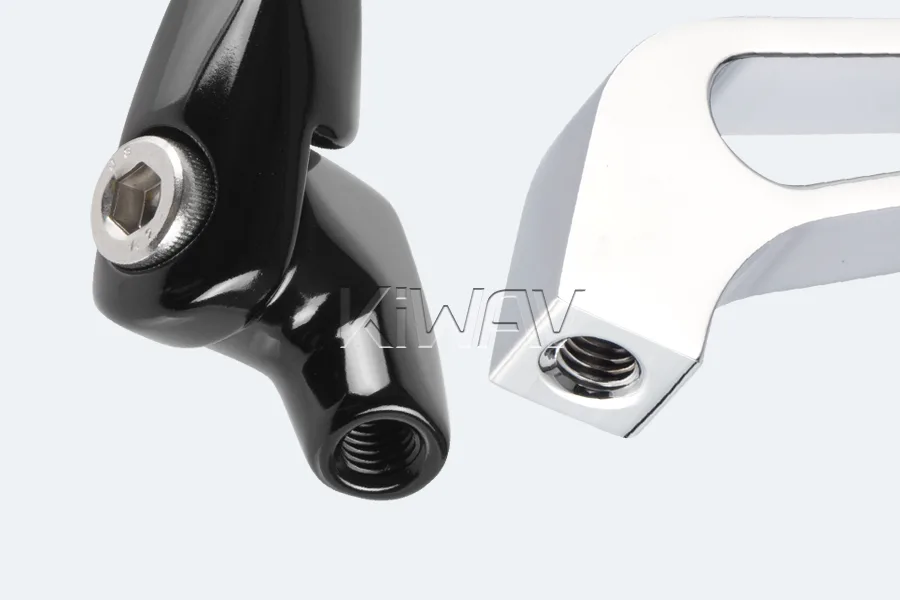
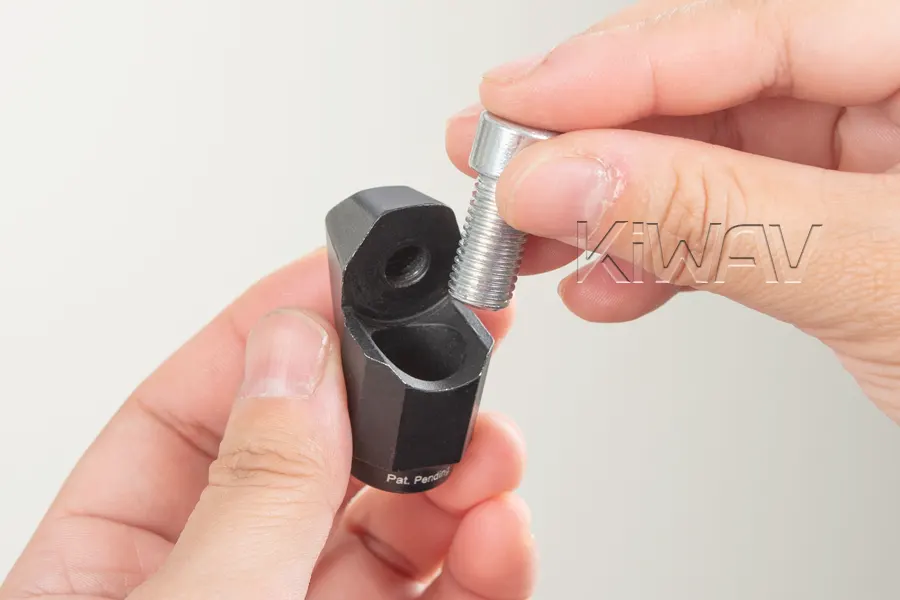
Type 2: Threaded Hole (Female)
The stem requires a separate bolt to be screwed into it.
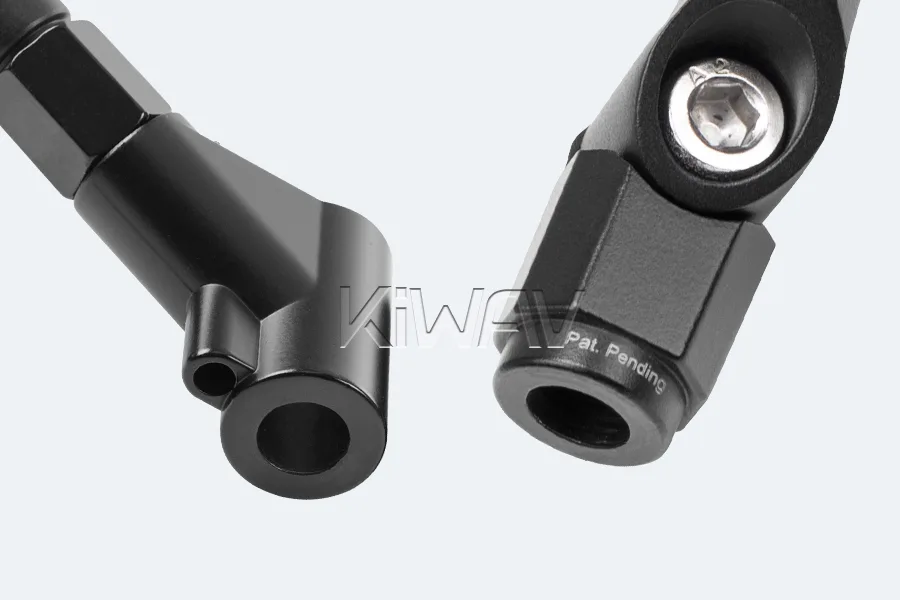
Type 3: Unthreaded Hole (Slot)
The stem has a smooth hole/slot designed for a bolt to pass through.
2. Identify Your Bike’s Mounting System (The "Perch End")
Check the mounting point on your handlebar. There are two primary ways mirrors are secured:
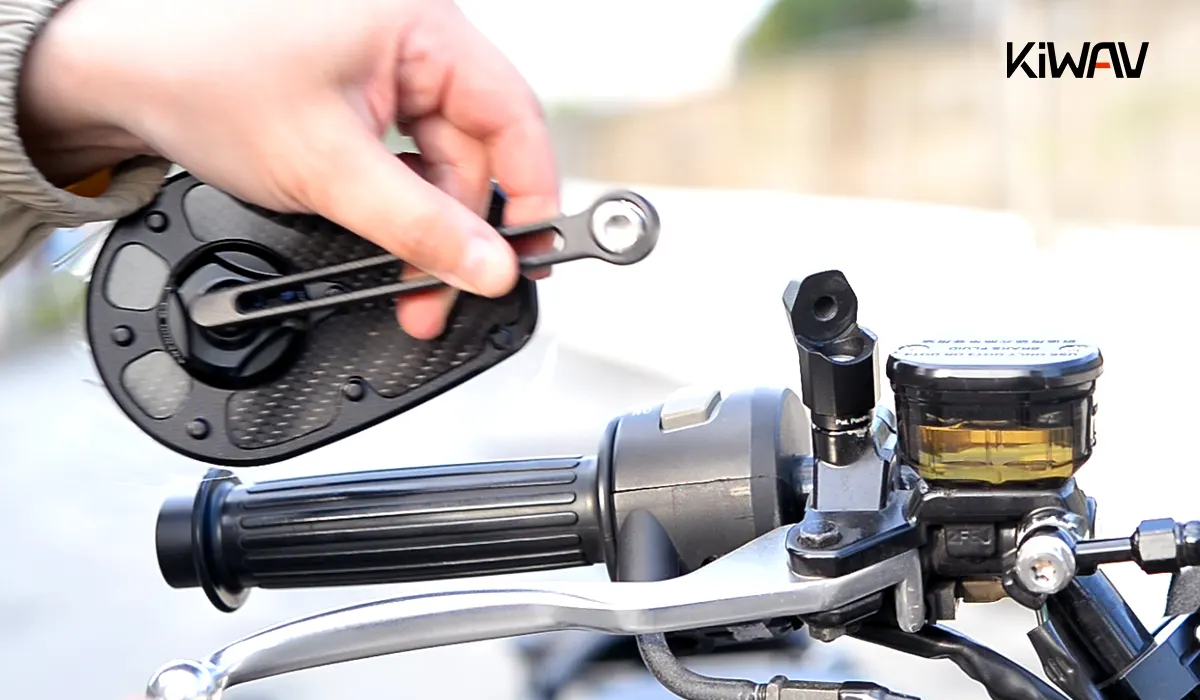
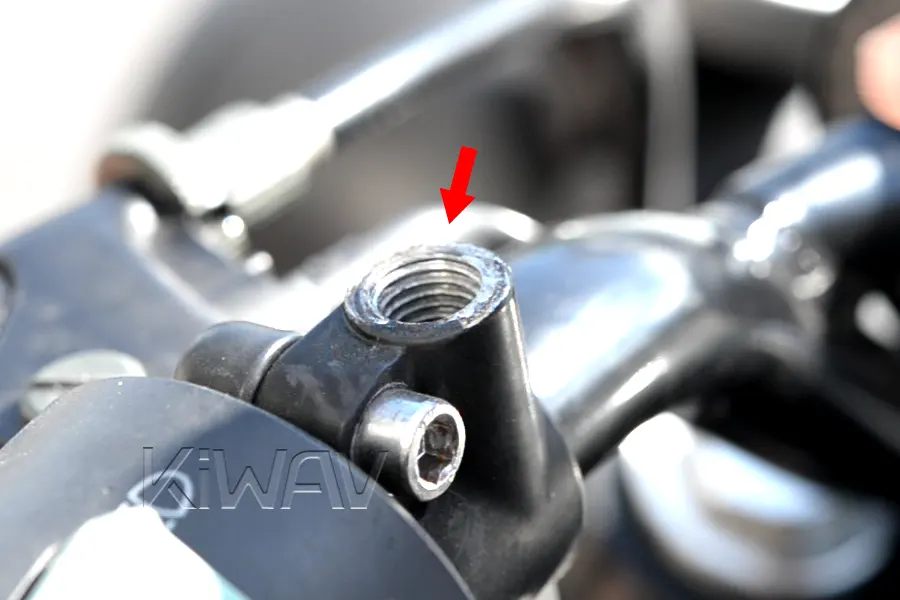
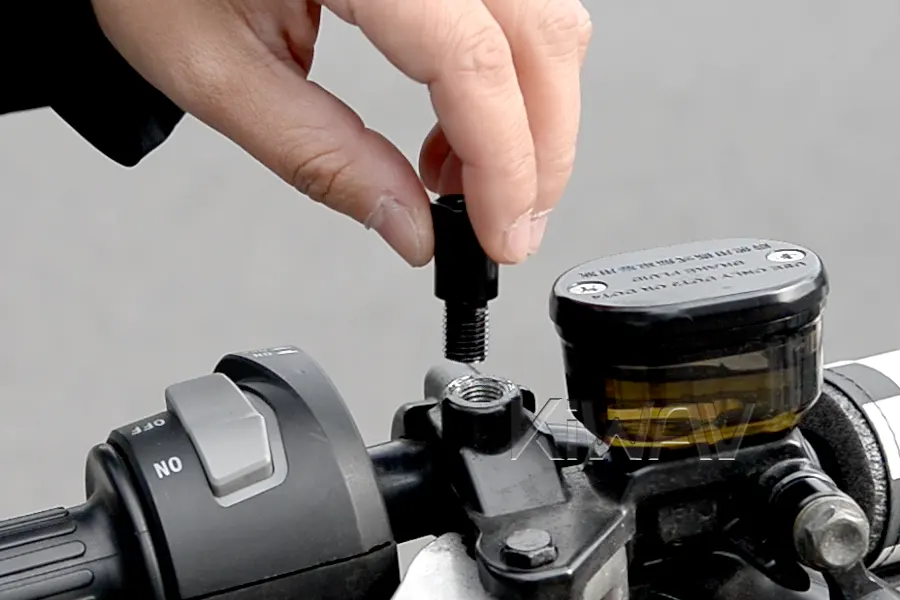
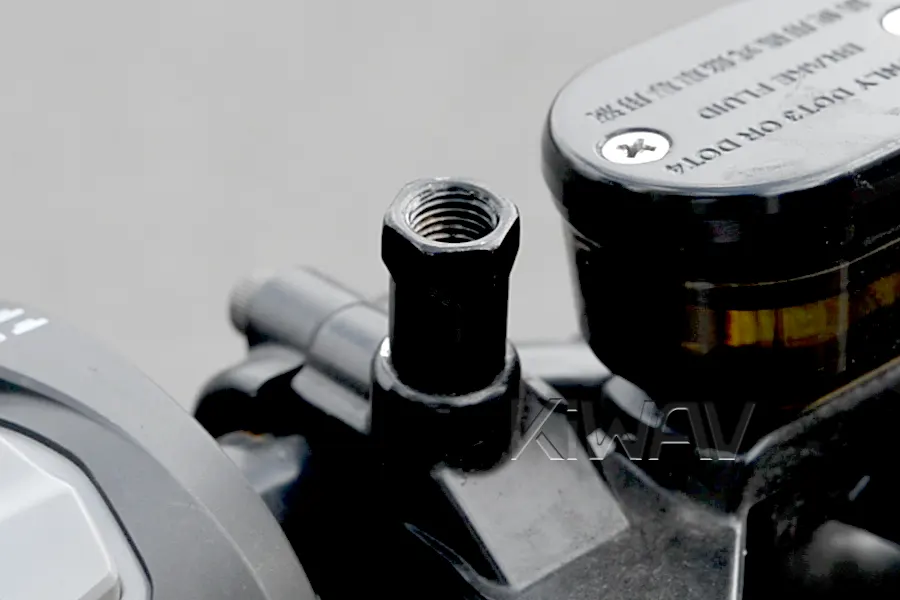
System A: Perch-Mount (Internal Threads)
The mirror screws directly into a threaded hole integrated into your brake or clutch lever housing.
Common on: Japanese bikes (Yamaha, Honda, etc.), Naked bikes, and Scooters.
Key Specs: Usually M10 or M8 threads (Common on Japanese/European bikes).
Note on Reverse Threads: Yamaha and KTM often use reverse threads on the right side.
Harley Street 500/750: Special 5/16” thread perch (not the typical Harley bolt-through style).
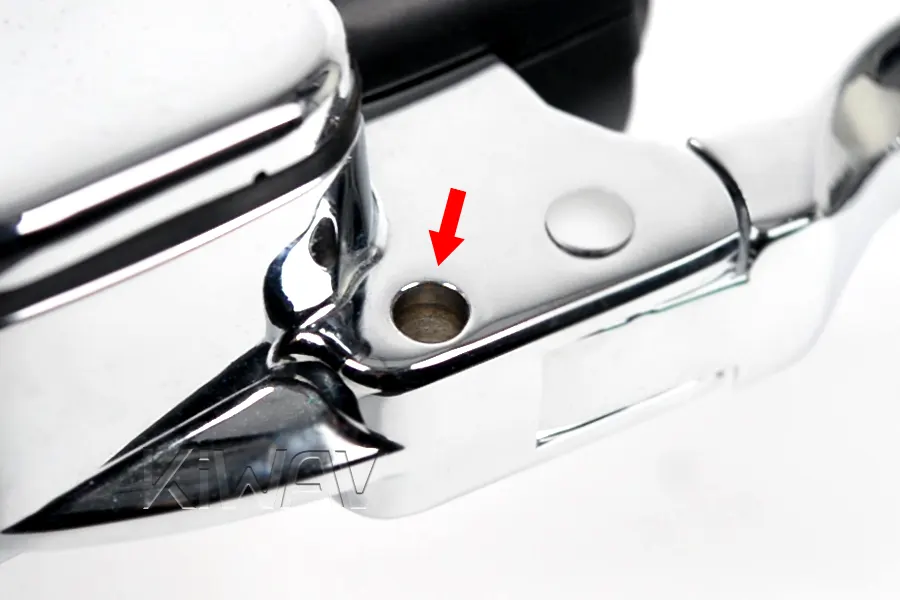
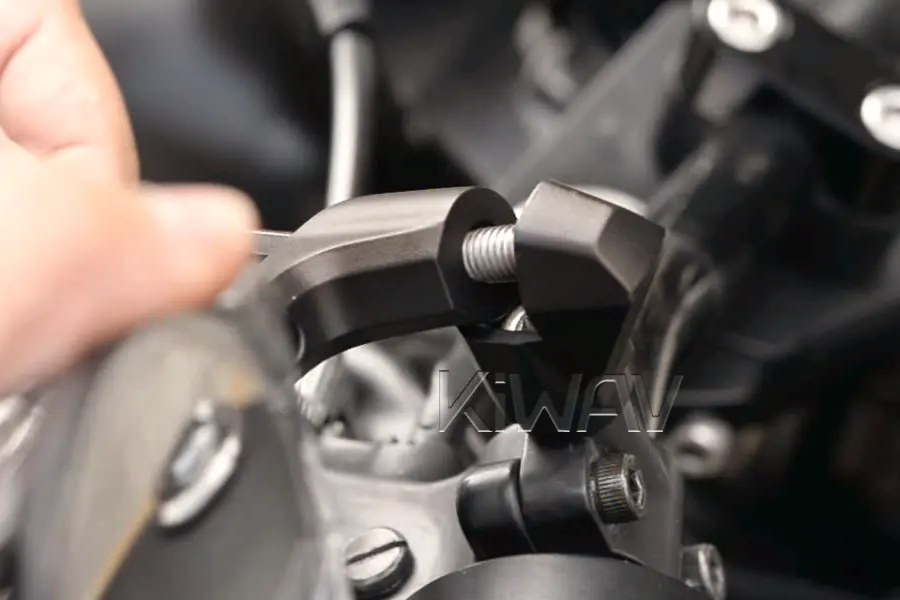
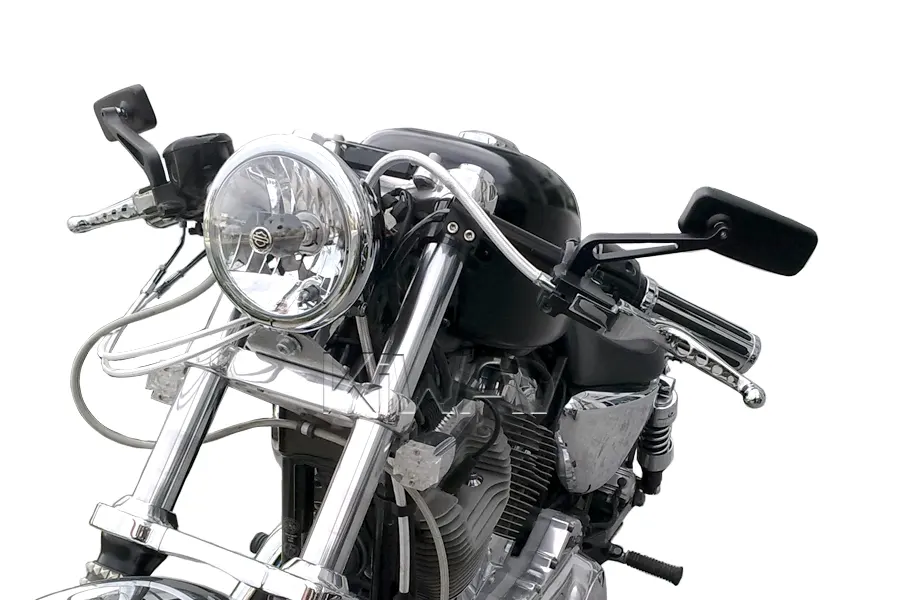
System B: Bolt-Through (Open Hole)
The mirror or bolt passes all the way through a non-threaded hole and is secured with a nut from the opposite side.
Common on: Harley-Davidson, Triumph, and BMW R18.
Key Specs: Requires a nut or bolt long enough to "sandwich" the perch.
Quick Navigation: Which Installation Path Do You Need?
Match your Perch System with your Mirror Type to find the right guide.
Threaded hole on the perch? → See System A (Perch-Mount)
Smooth hole through the perch? → See System B (Bolt-Through)
Then check your mirror stem
Mirror has a threaded stud → Type 1 (Male Stud)
Mirror has a threaded hole → Type 2 (Female Hole)
Mirror has a smooth slot or hole → Type 3 (Unthreaded Slot)
Step-by-Step Installation Instructions
Handlebar-mounted upgrades follow two distinct paths based on your bike's hardware.
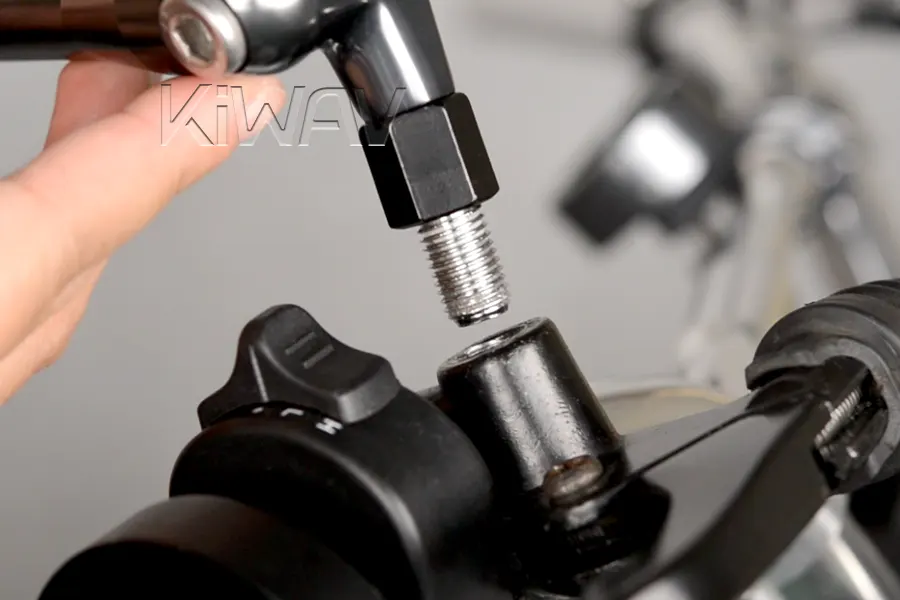
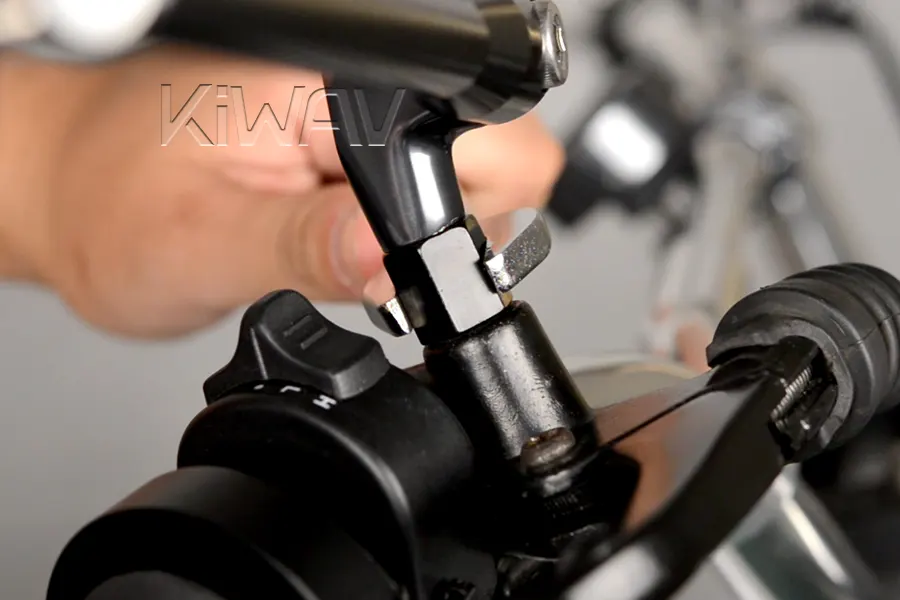
System A: Perch-Mount Installation
Pro-Tip: If the mirror keeps spinning and won't tighten, check if your bike requires a Reverse-Thread adapter, especially on the right (throttle) side.
A1. Mirror with Threaded Stud (Male)
[Direct Thread-In] Installation Steps
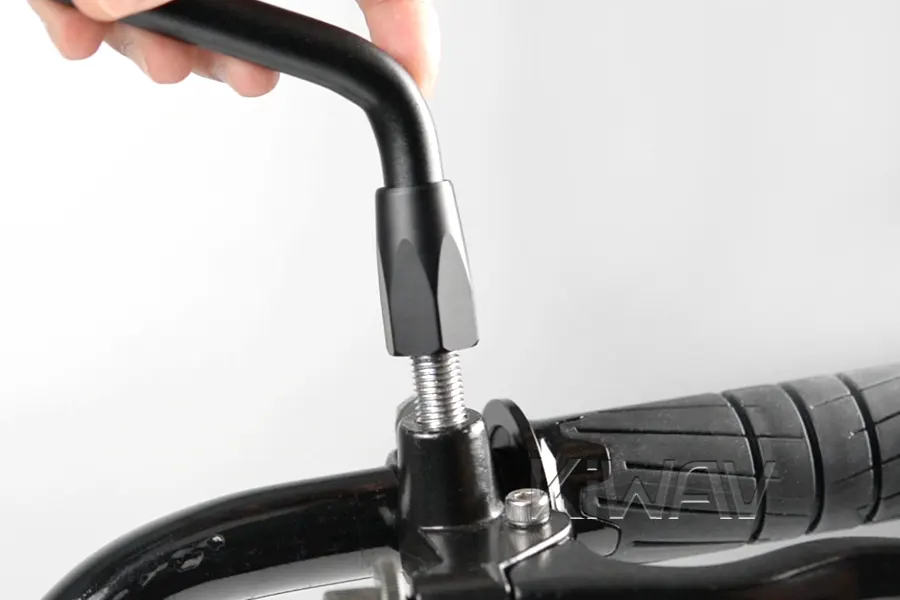
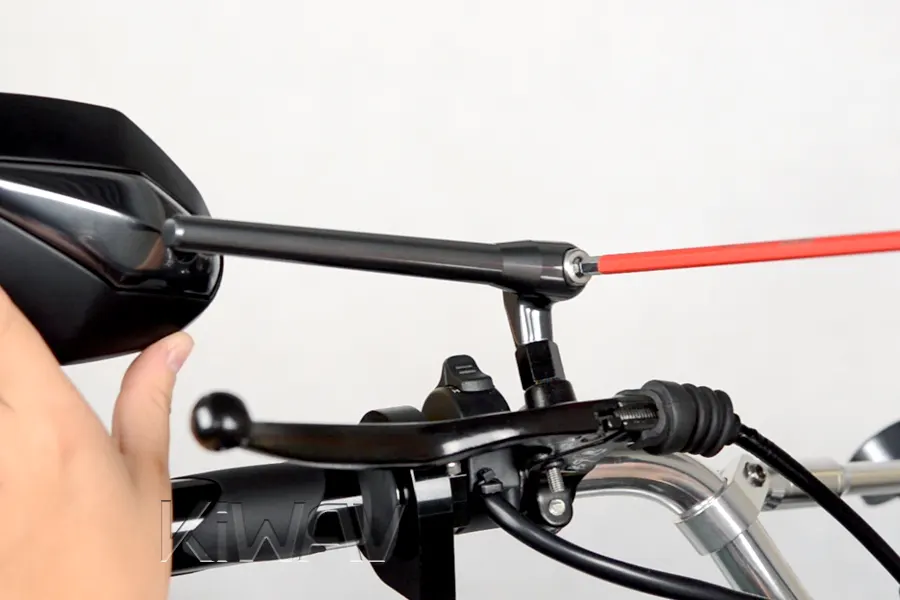
Thread the Mirror: Screw the mirror stud into the perch until it bottoms out.
Set Orientation: Back the mirror stem off slightly (reverse it) until you reach the desired visual position.
Secure the Jam Nut: While holding the mirror stem steady, thread the jam nut downward until it seats firmly against the perch.
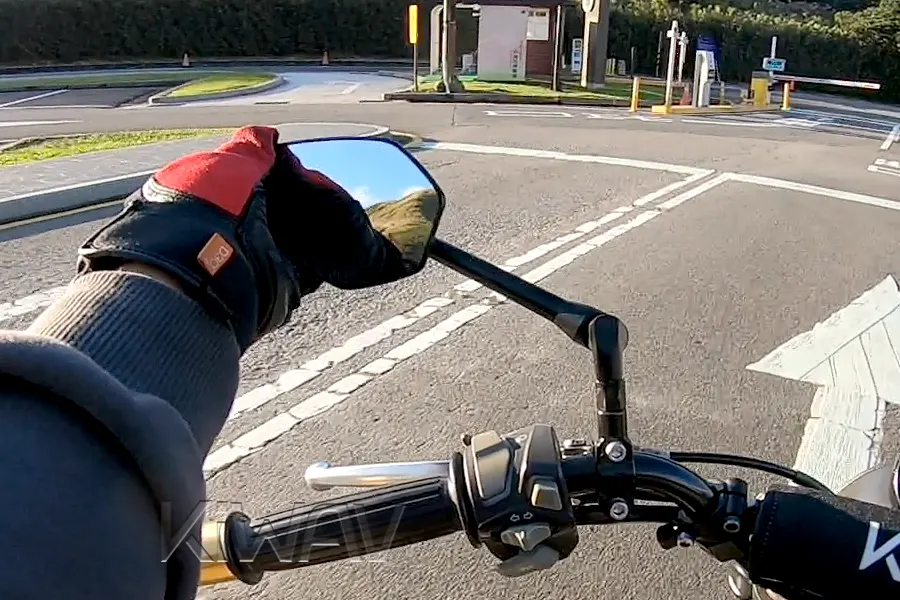
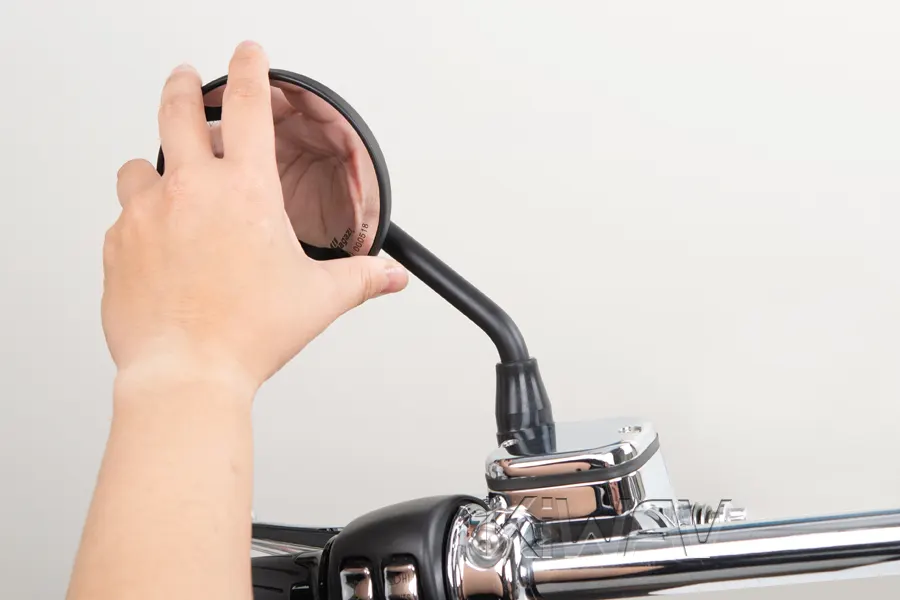
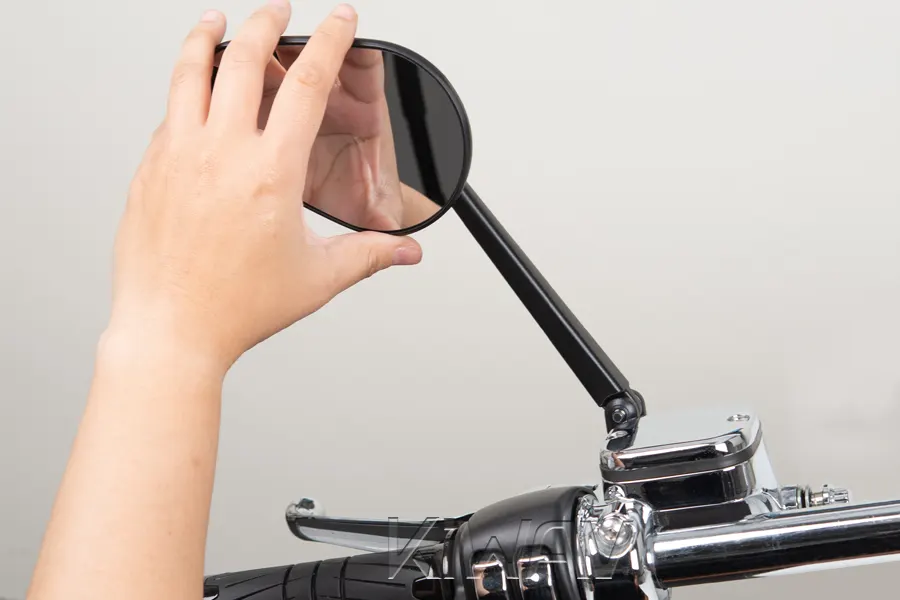
Adjust & Final Torque: Fine-tune any adjustable joints on the mirror stem or plate in riding position, then perform a final torque check.
Hardware Assembly: Pass the mounting bolt through the open slot of the mirror stem base. (If your mirror stem is detachable, remove the stem from the base first.)
Preliminary Placement: Position the mirror base over the perch and thread the bolt into the boss.
Positioning: In your riding position, slightly slide the base within its slot to find your ideal reach and height.
Stem Reassembly (If Necessary): If the mirror stem was detached in Step 1, tighten the mounting bolt securely now, then thread the mirror stem back into the secured base.
Adjust & Final Torque: Fine-tune any adjustable joints on the mirror stem or plate, then perform a final torque check.
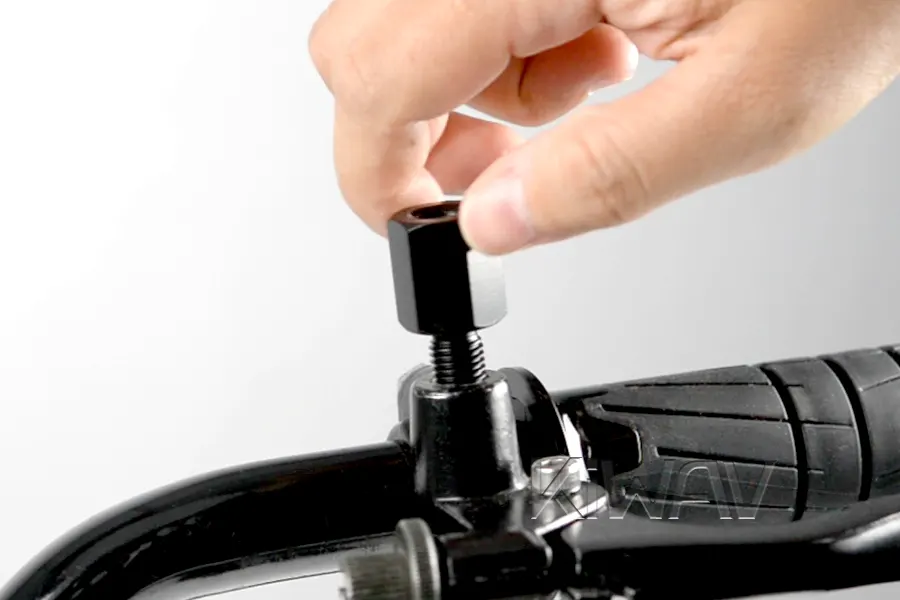
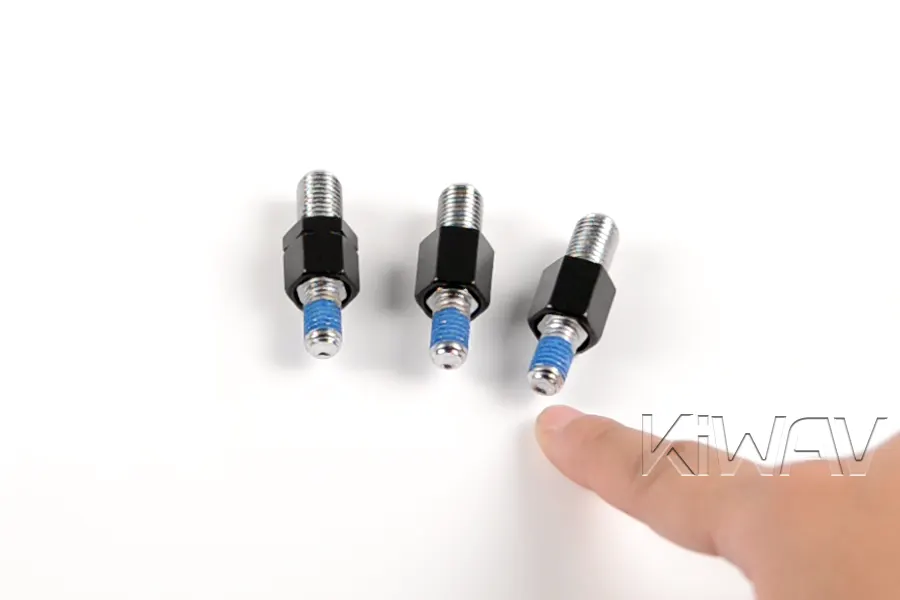
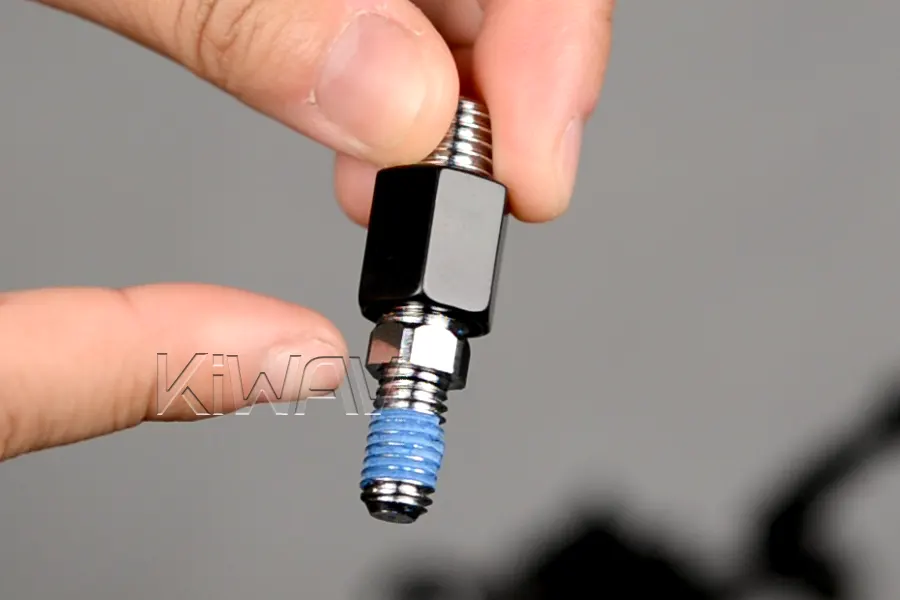
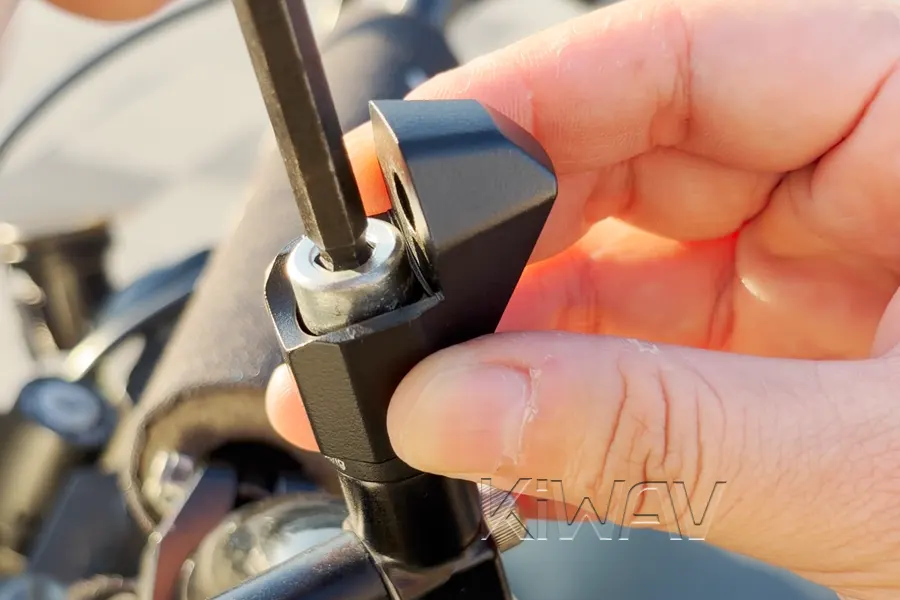
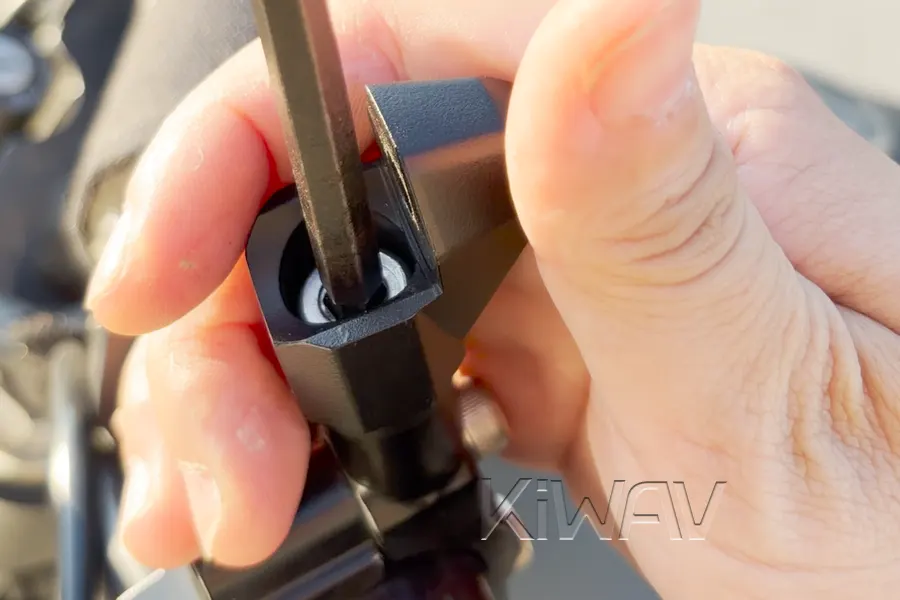
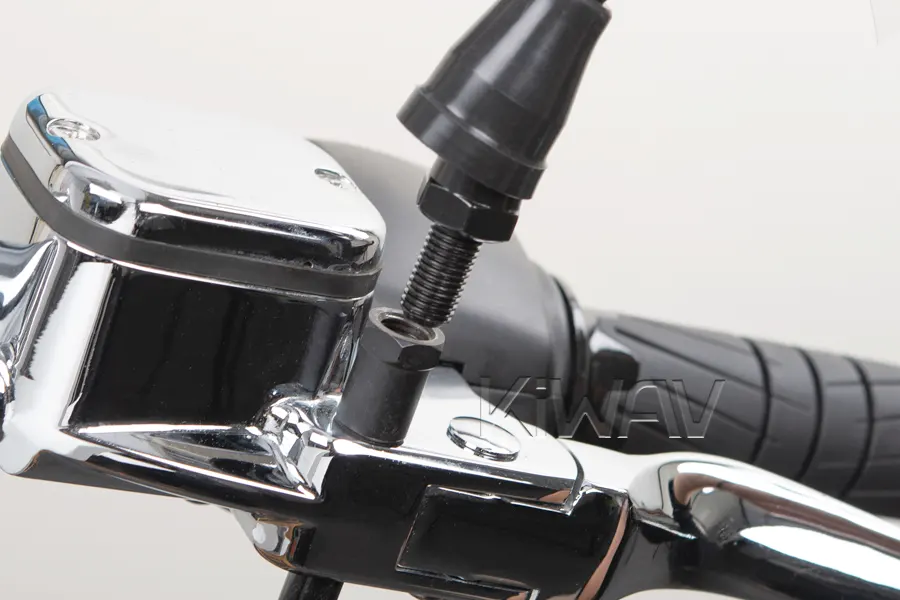
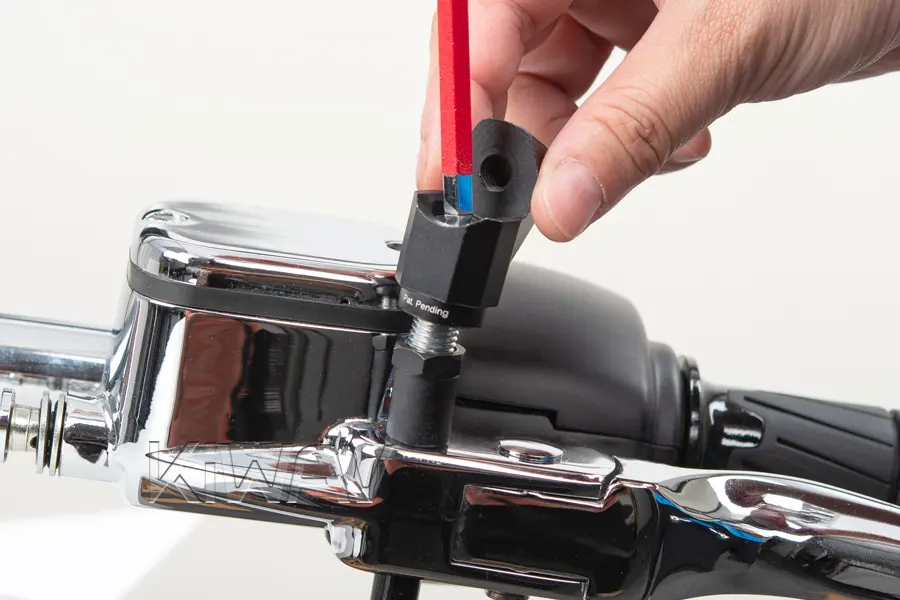
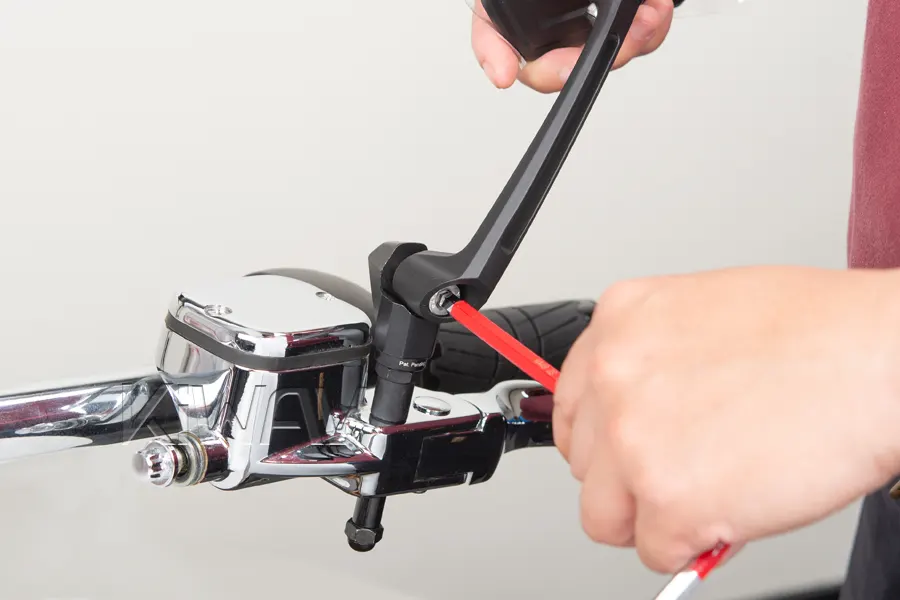
Install Adapter: Secure the adapter into the handlebar perch first.
Hardware Assembly: Pass the mounting bolt through the open slot of the mirror stem base. (If your mirror stem is detachable, remove the stem from the base first.)
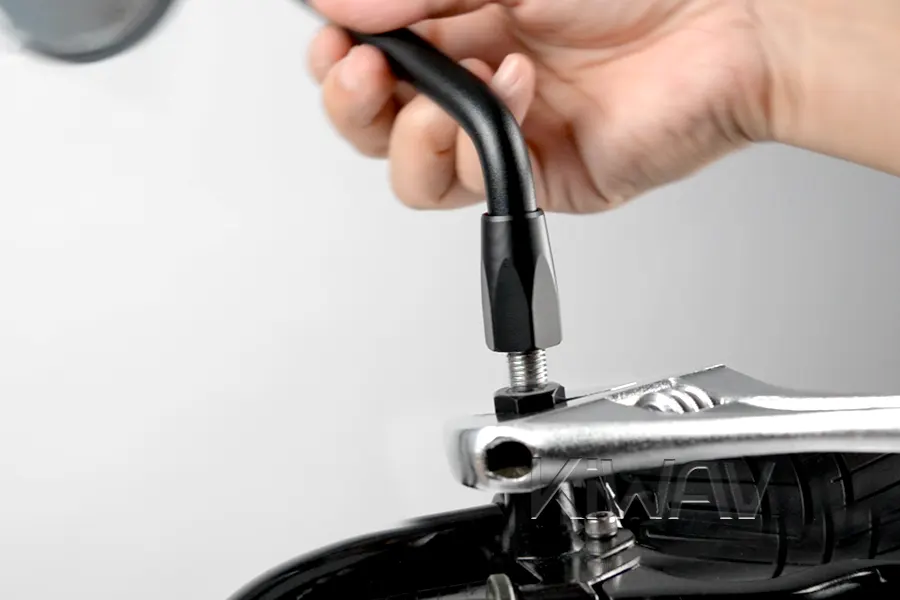
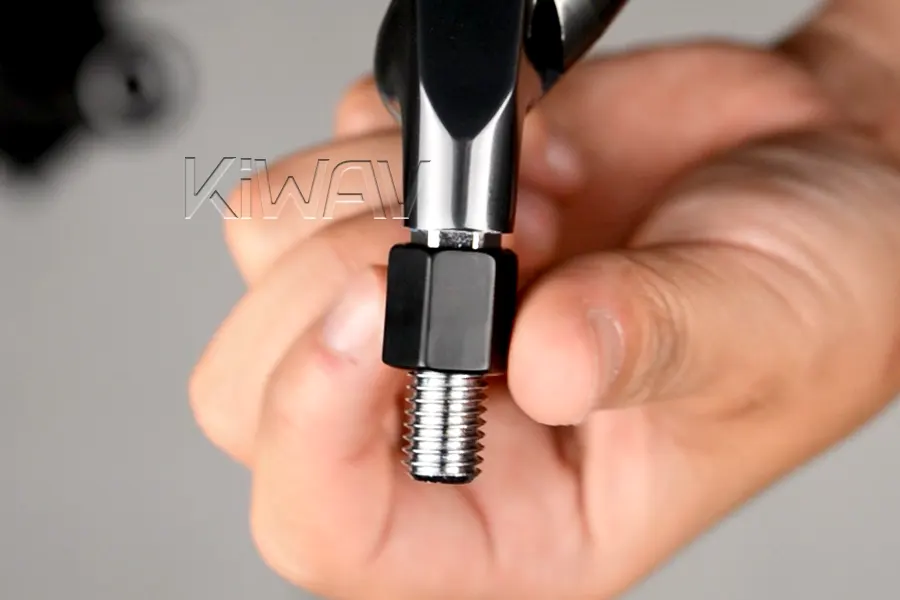
Preliminary Placement: Thread the stem base into the top of the adapter.
Positioning: In your riding position, slightly slide the base within its slot to find your ideal reach and height.
Stem Reassembly (If Necessary): If the mirror stem was detached in Step 2, tighten the mounting bolt securely now, then thread the mirror stem back into the secured base.
Adjust & Final Torque: Fine-tune any adjustable joints on the mirror stem or plate in riding position, then perform a final torque check.
System B: Bolt-Through Installation
The bolt-through mounting system offers maximum flexibility, allowing mirrors to be mounted either upright or underslung (downward) depending on your motorcycle's style and clearance.
UnderslungUpright
B1. Mirror with Threaded Stud (Male)
[Direct Pass-Through] Installation Steps
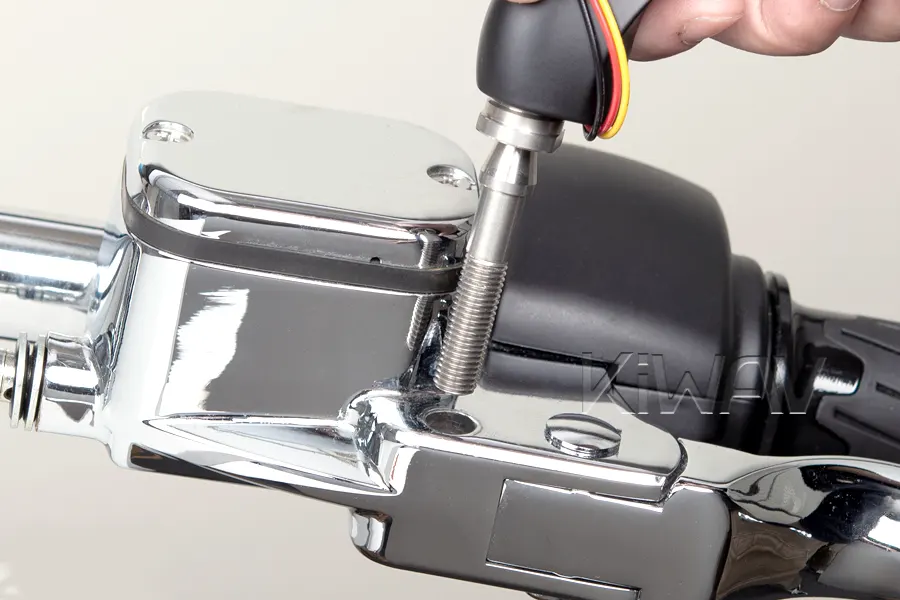
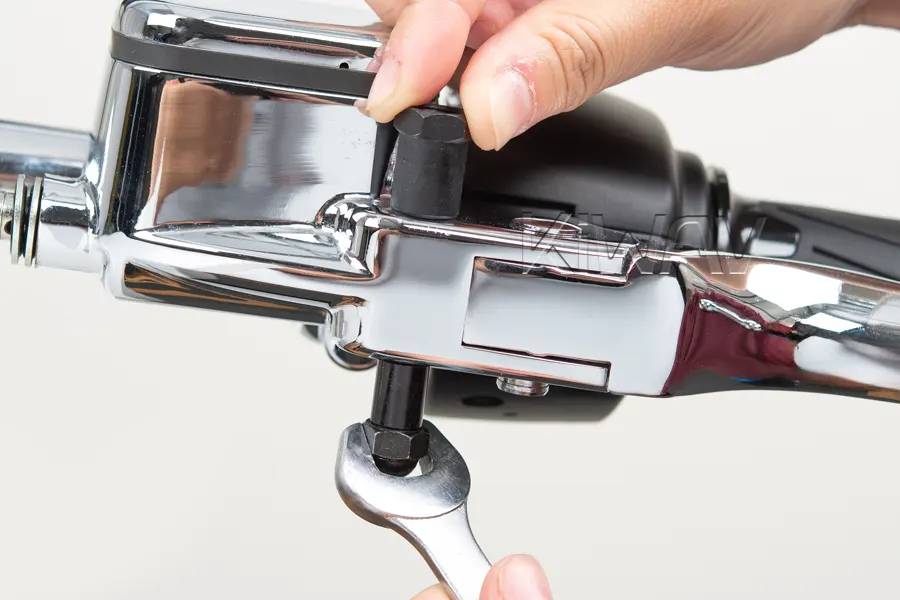
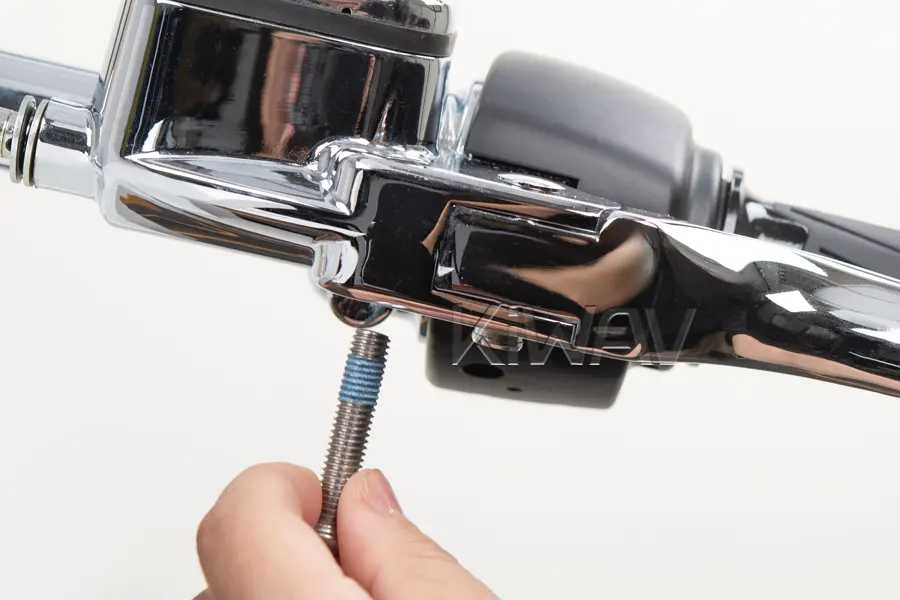
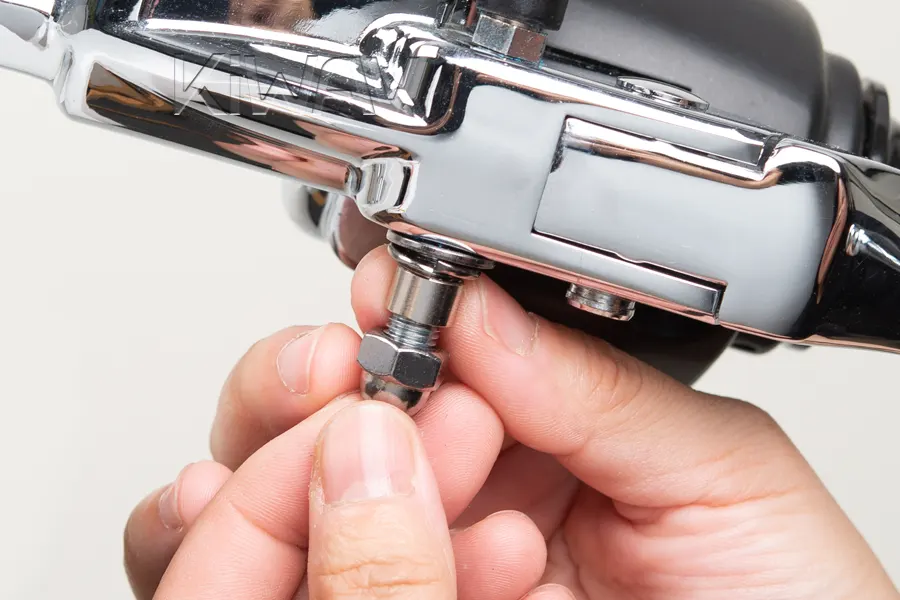
Insertion: Slide the mirror stud through the perch hole from your chosen direction (top-down for upright, bottom-up for underslung).
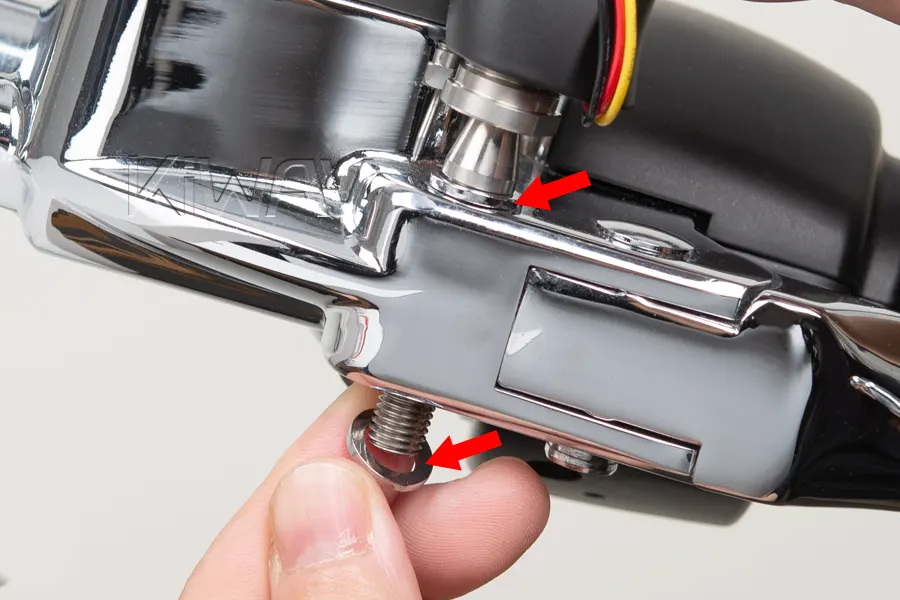
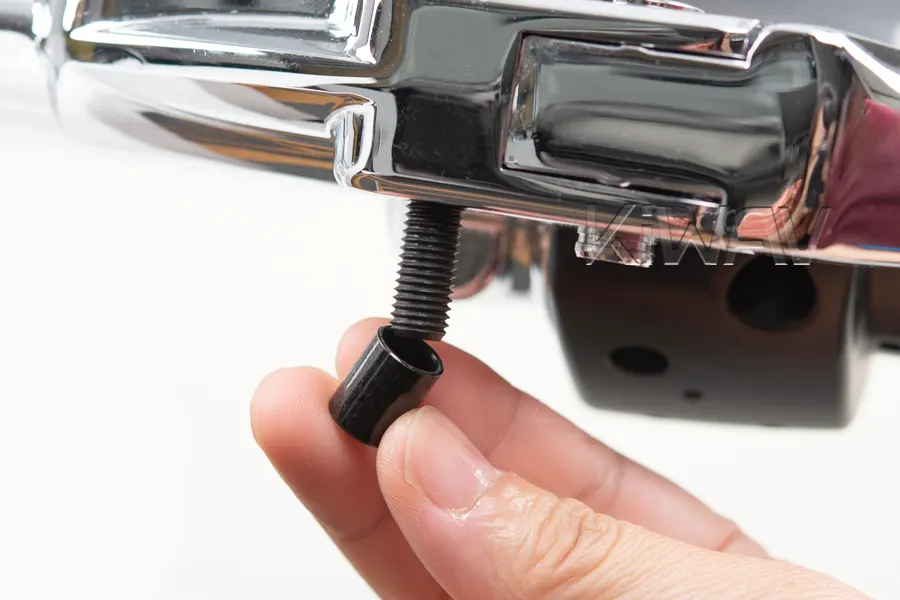
Hardware Stack: On the opposite side of the perch, slide the washers and spacers onto the protruding stud. *Ensure the spacers are seated flush against the perch to prevent unwanted vibration.
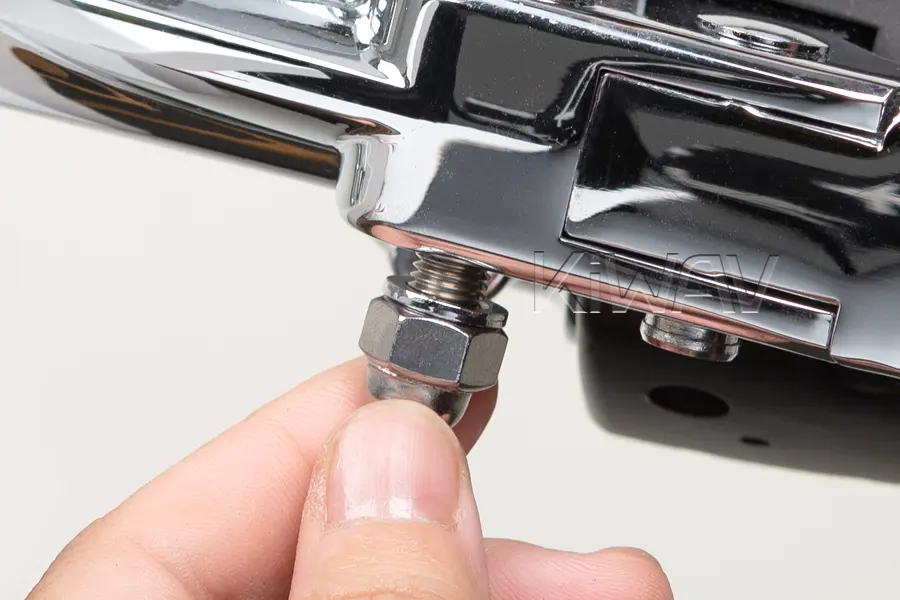
Fasten the Nut: Thread the acorn nut (or hex nut) onto the stud by hand first to ensure no cross-threading occurs then tighten it.
Adjust & Final Torque: Fine-tune any adjustable joints on the mirror stem or plate in riding position, then perform a final torque check.
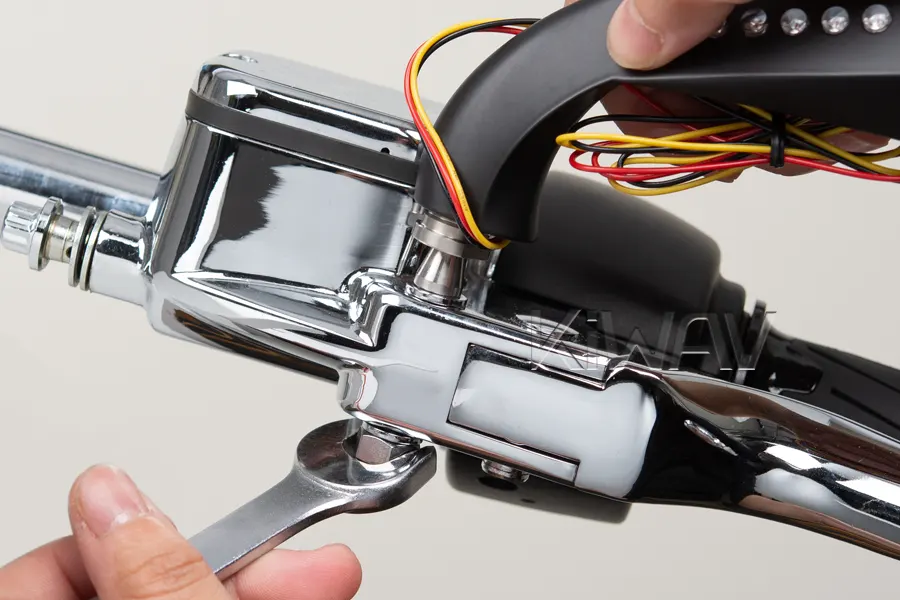
Insertion: Slide the adapter through the perch hole from your chosen direction (top-down for upright, bottom-up for underslung).
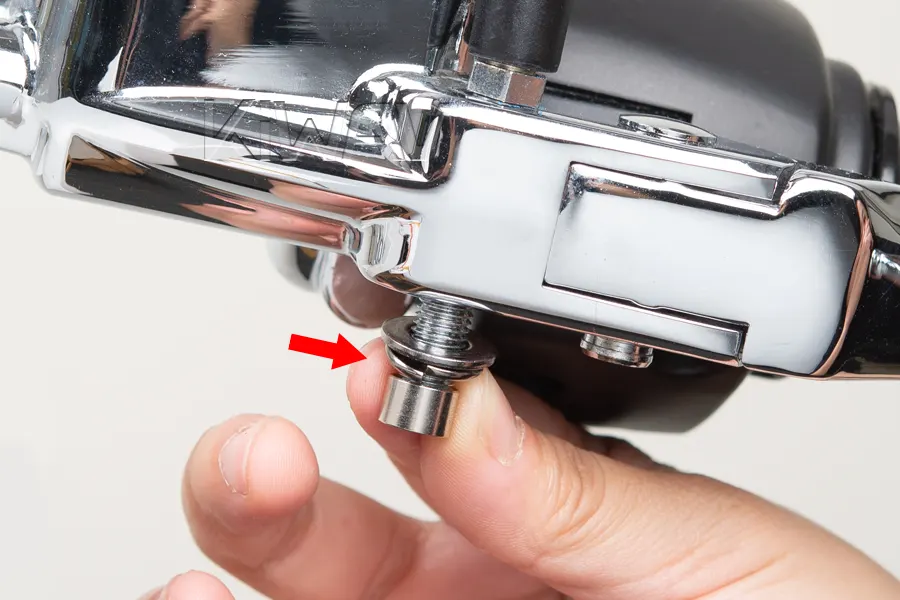
Secure Adapter: Place washers and spacers onto the protruding thread on the opposite side, and secure with the acorn or hex nut. *Ensure the spacers are seated flush against the perch to prevent unwanted vibration.
Add washers and spacers as needed based on your motorcycle's perch thickness.Ensure they are seated flush against the perch to prevent unwanted vibration.
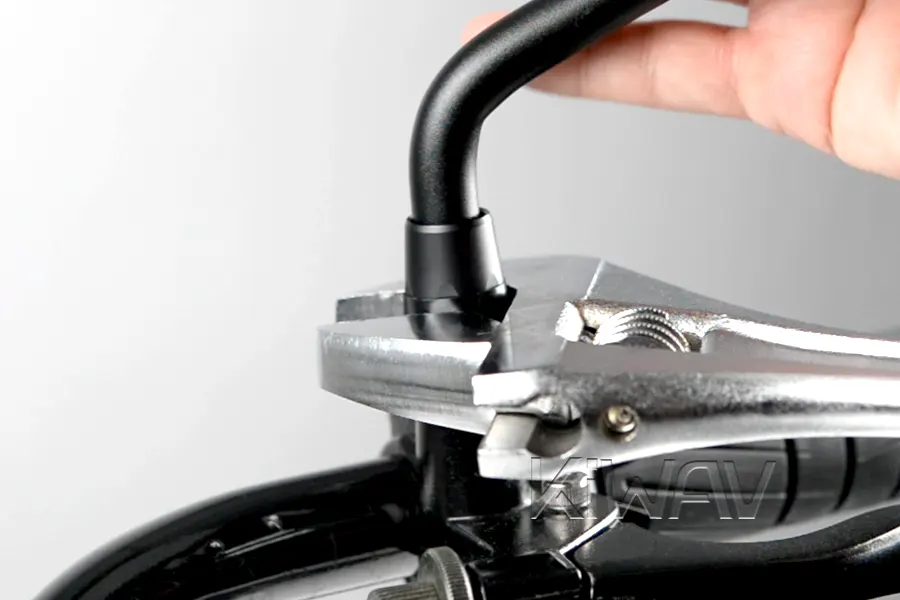
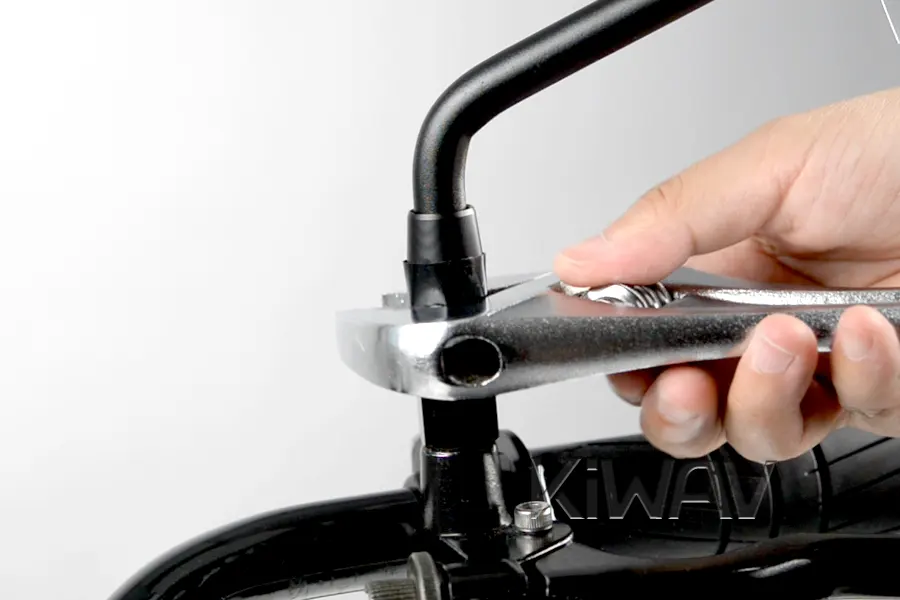
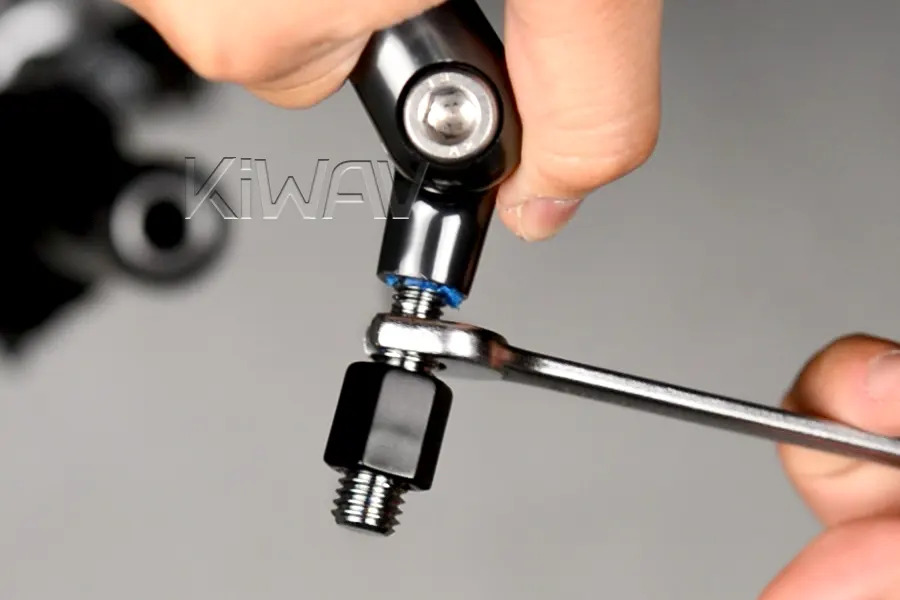
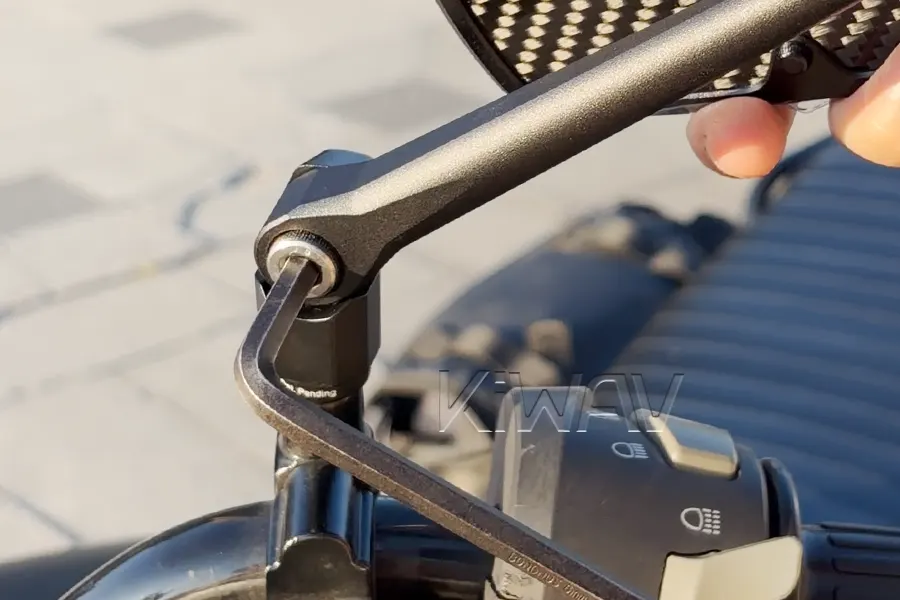
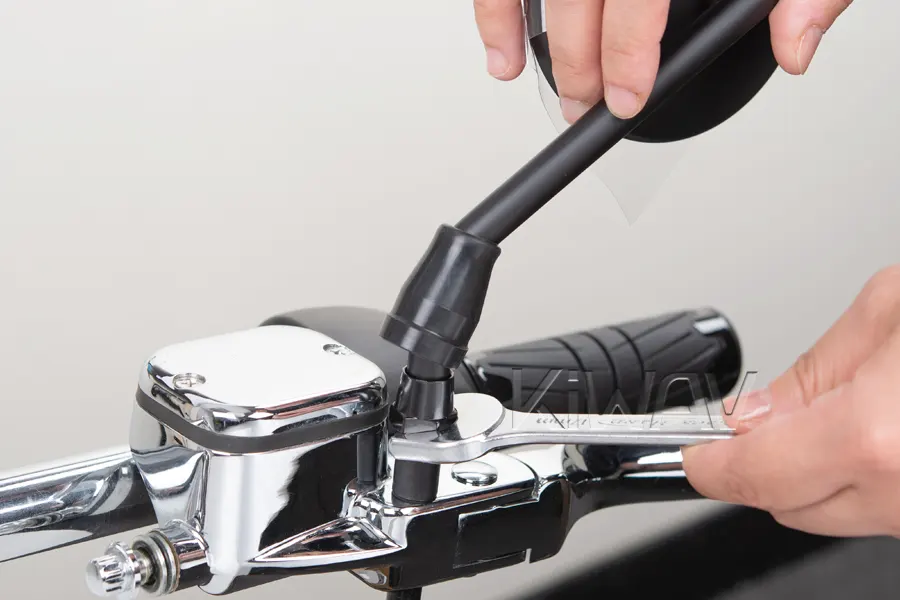
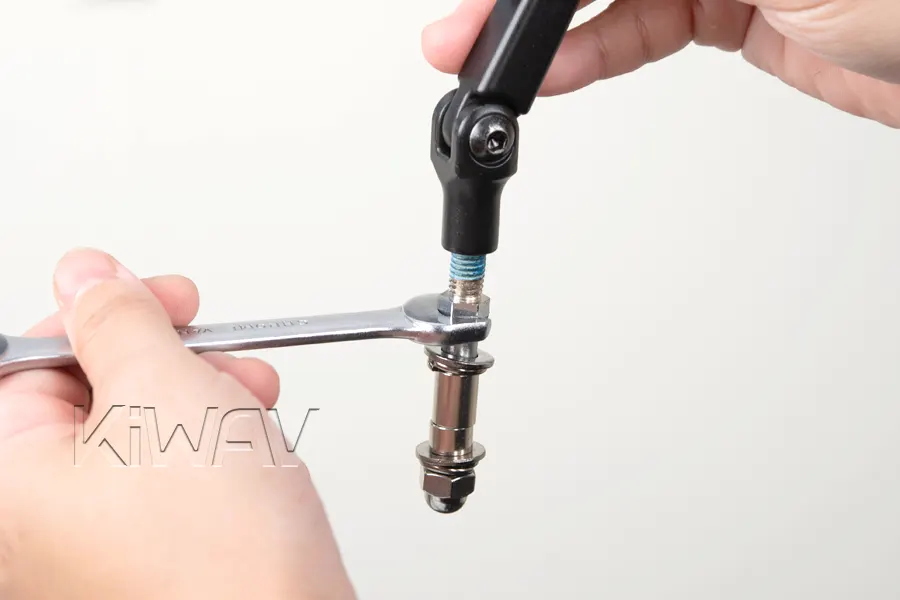
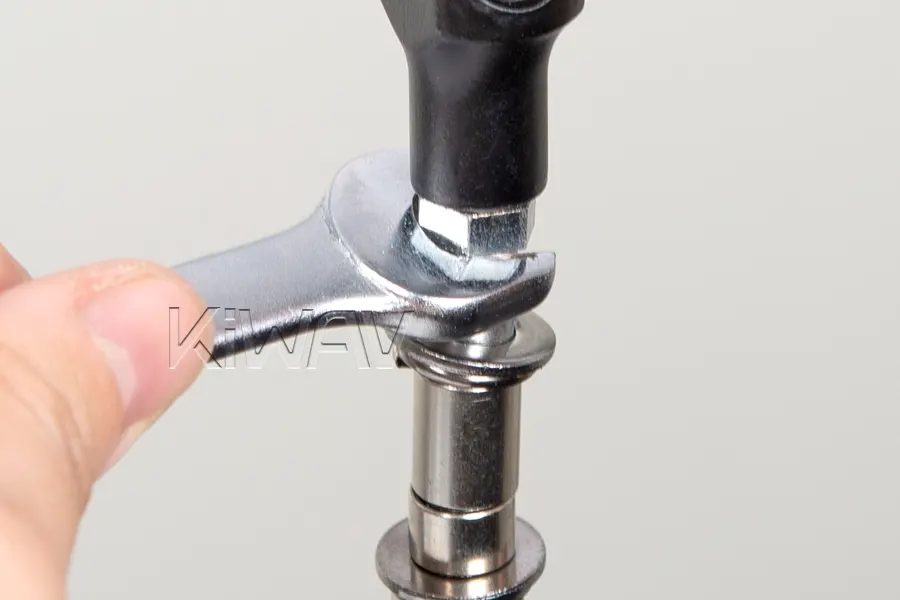
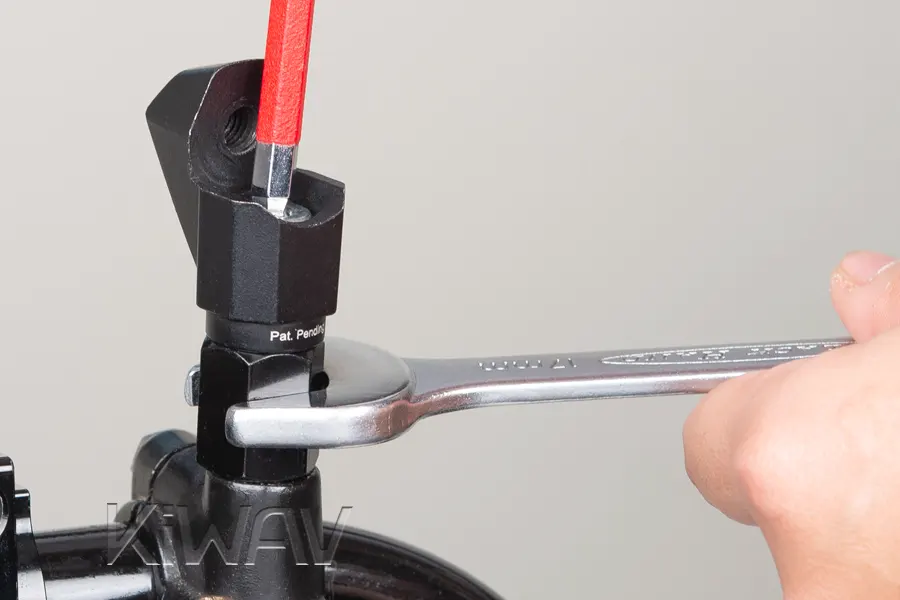
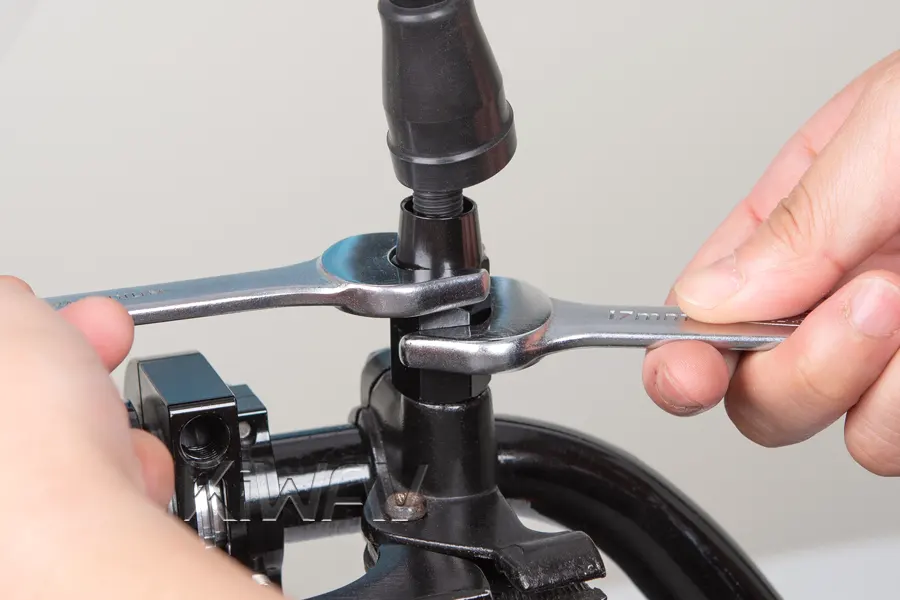
Install the Mirror: Thread the mirror stud into the adapter. (Use a wrench to hold the adapter body still to prevent it from turning if needed.)
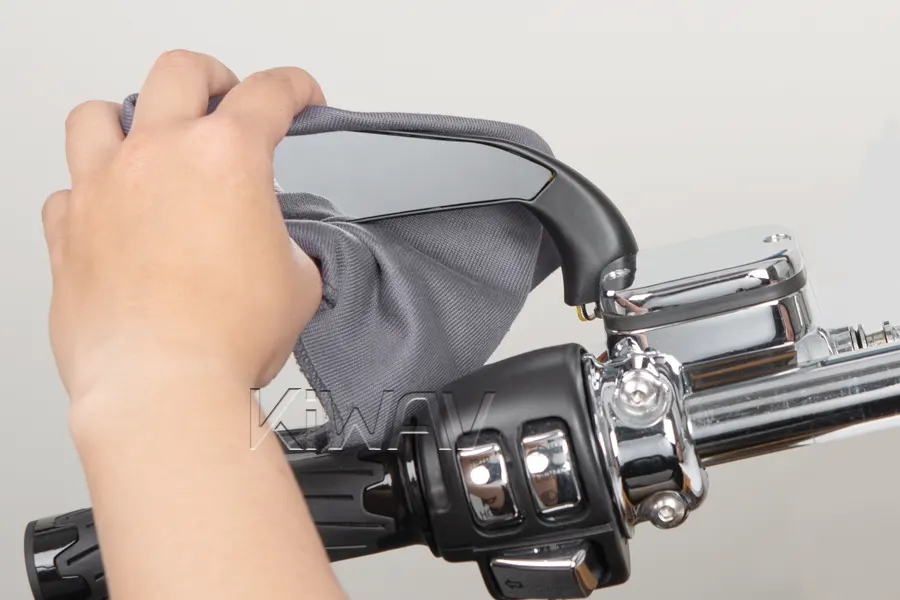
Adjust & Final Torque: Fine-tune any adjustable joints on the mirror stem or plate in riding position, then perform a final torque check.
B2. Mirror with Threaded Hole (Female)
This setup requires a long bolt or a dedicated adapter to secure the mirror.
[Direct Bolt-In] Installation Steps
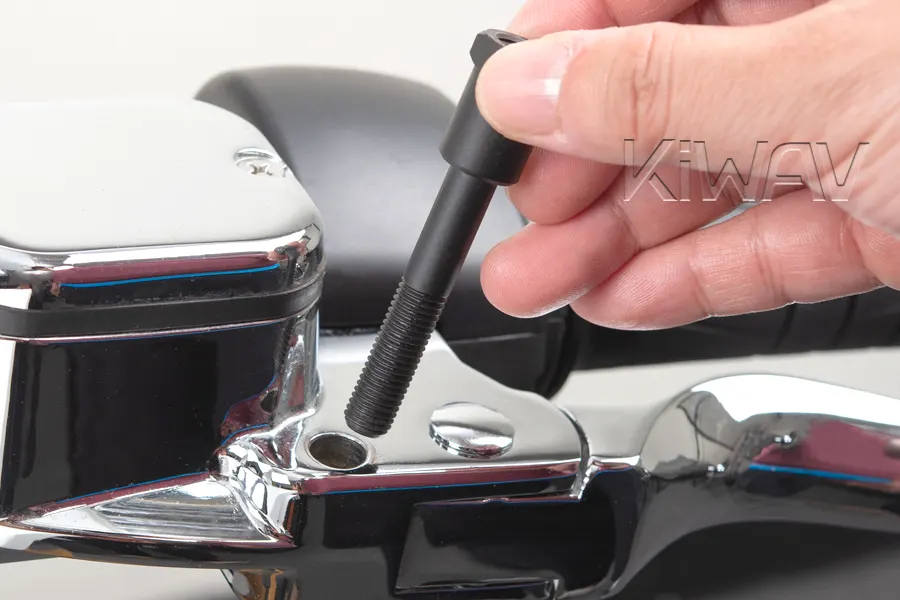
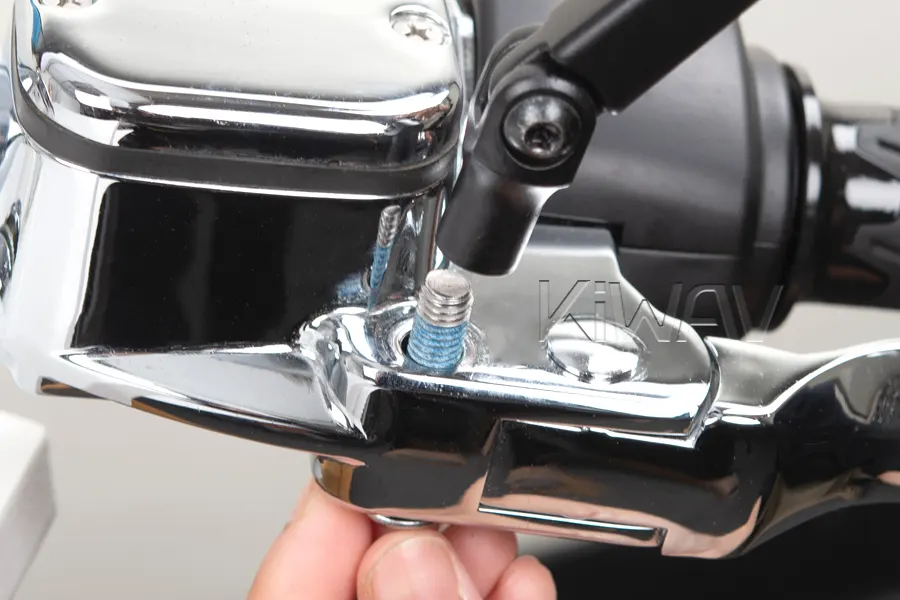
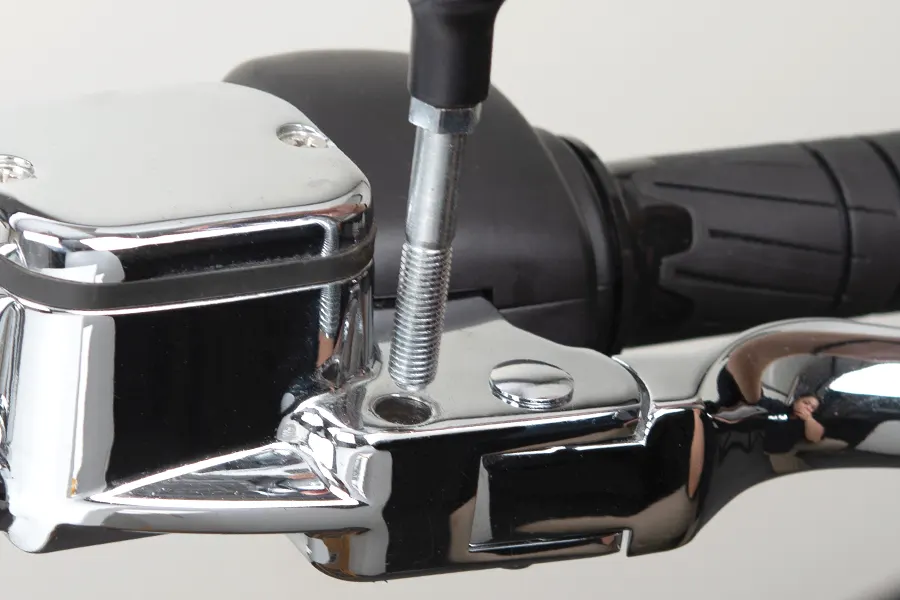
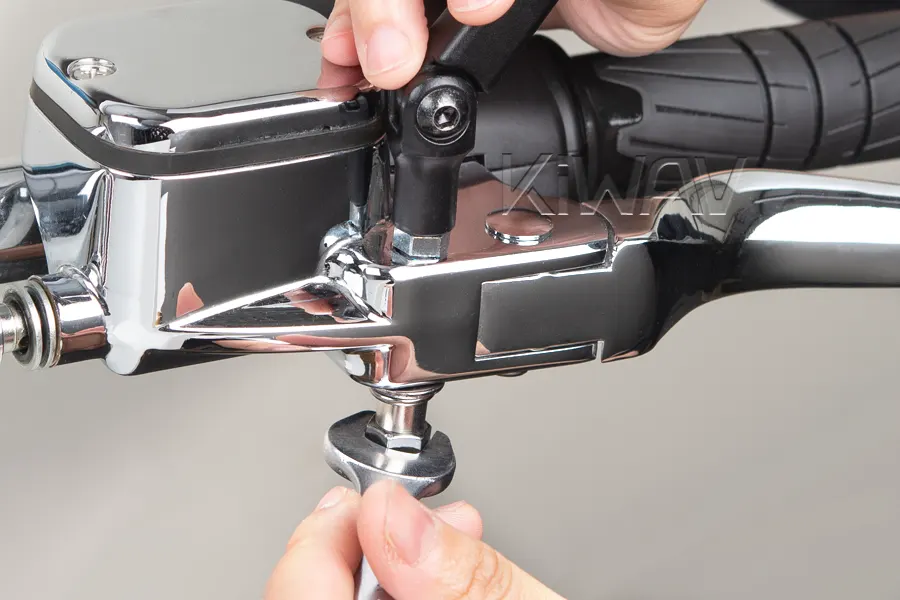
Insertion: Insert the mounting bolt through the perch hole from your chosen direction (bottom-up for upright mirror, top-down for underslung mirror).
Alignment: Position the mirror stem over the mounting hole from the opposite side.
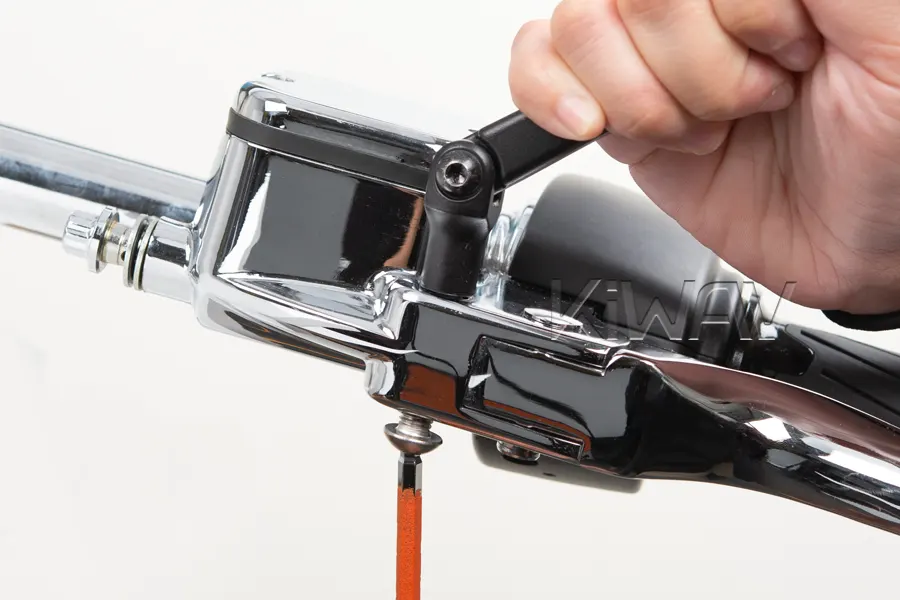
Engagement: Thread the bolt into the mirror stem and tighten the bolt.
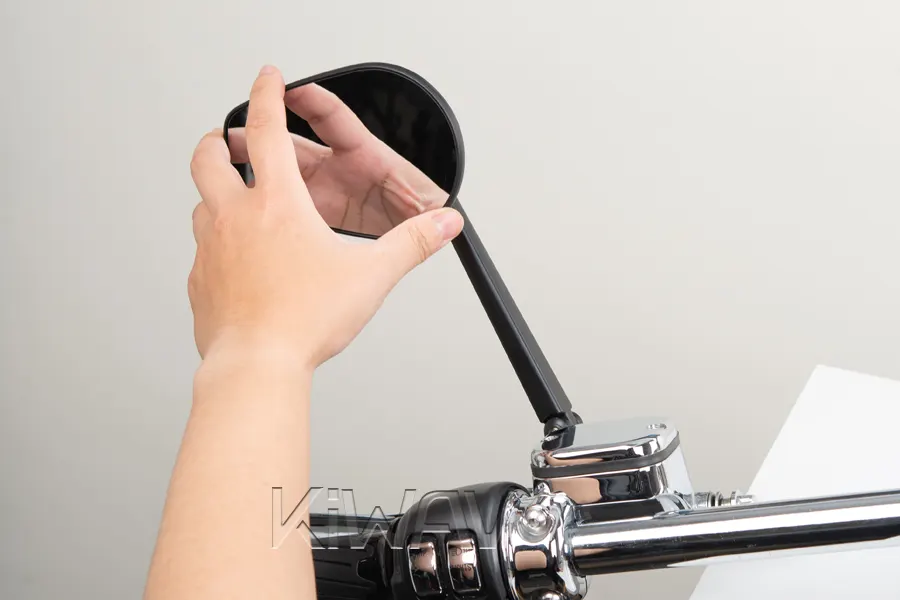
Adjust & Final Torque: Fine-tune any adjustable joints on the mirror stem or plate in riding position, then perform a final torque check.
[Via Adapter] Installation Steps
Pre-Assemble the Stud: Thread the adapter into the mirror stem and tighten the bolt until seated. Crucial: Ensure the side with pre-applied threadlocker (Loctite) enters the mirror stem first.
Insertion: Insert the now-integrated mirror stud through the perch hole from your chosen direction (top-down for upright, bottom-up for underslung).
Hardware Stack: Slide the washers and spacers onto the protruding stud from the opposite side. *Ensure the spacers are seated flush against the perch to prevent unwanted vibration.
Fasten the Nut: Thread the acorn nut (or hex nut) onto the stud by hand first to ensure no cross-threading occurs then tighten it.
Adjust & Final Torque: Fine-tune any adjustable joints on the mirror stem or plate in riding position, then perform a final torque check.
B3. Mirror with Unthreaded Hole (Slot)
Installation Steps
Insertion: Slide the adapter through the perch hole from your chosen direction (top-down for upright, bottom-up for underslung).
Secure Adapter: Place washers and spacers onto the protruding thread on the opposite side, and secure with the acorn or hex nut. *Ensure the spacers are seated flush against the perch to prevent unwanted vibration.
Add washers and spacers as needed based on your motorcycle's perch thickness.Ensure they are seated flush against the perch to prevent unwanted vibration.
Hardware Assembly: Pass the mounting bolt through the open slot of the mirror stem base. (If your mirror stem is detachable, remove the stem from the base first.)
Positioning: In your riding position, slightly slide the base within its slot to find your ideal reach and height.
Stem Reassembly (If Necessary): If the mirror stem was detached in Step 3, tighten the mounting bolt securely now, then thread the mirror stem back into the secured base.
Adjust & Final Torque: Fine-tune any adjustable joints on the mirror stem or plate in riding position, then perform a final torque check.
The Safety Checklist After Installation
Is the mirror tightened to the correct torque?
Is the mirror base free from cracks or wear?
Does the image remain clear at highway speed?
Are blind spots reduced on both sides?
Does the mirror height match your riding posture?
Skipping any of these checks can compromise safety.
Common Installation Problems
Problem
Cause
Fix
Mirror won't screw in
Wrong thread size
Use adapter
One side doesn't tighten
Reverse thread (Yamaha)
Turn opposite direction
Mirror vibrates
Loose mount / no damping
Tighten + add washer
Mirror angle wrong
Perch angle mismatch
Adjust lever perch
Pro Tips: Professional Installation Secrets
1. Tighten the base before adjusting the mirror head
Do not spend time perfecting the mirror angle until the base hardware is fully secured.
2. Confirm thread direction before forcing anything
If a mirror resists threading, stop. Reverse-thread applications are common enough to cause mistakes.
3. Check the interface between the mirror and the adapter
In mixed-thread setups (Standard + Reverse), it’s easy to overlook this connection. You should hold the adapter still with a wrench when screwing the mirror in.
4. Avoid over-tightening
While stability is key, excessive torque can strip the delicate threads on your perch or master cylinder. Tighten until firm, then check for movement before adding that final fractional turn.
5. Do not rely on “close enough” hardware
A mirror that almost fits is often the one that vibrates, loosens, or damages threads later.
6. Check full steering lock
Before riding, turn the bars fully left and right to confirm there is no interference with:
Windshield
Fairing
Cables
Brake lines
7. Recheck after the first ride
Fresh installations should always be rechecked after a short ride. Vibrations from the first few miles can settle the hardware, making a quick re-torque essential, especially if adapters or slot-mounted hardware are involved.
Mirror Installation Troubleshooting
Why won’t my mirror tighten?
Usually one of these is wrong:
Wrong thread direction
Wrong thread pitch
Missing or incorrect adapter
Loose mirror-to-adapter connection
Jam nut not seated
Bolt bottoms out before clamping
Spacer stack too tall
Mirror body being turned instead of the locking hardware
Q: What happens if I change to an aftermarket master cylinder?
The original mirror mount may be removed, requiring an adapter or alternate mounting solution.
Q: Are motorcycle mirrors reverse thread?
Some are. Reverse-thread mirror mounts are especially common on the right side of certain motorcycles, including many Yamaha and KTM applications. Always verify before installation.
Q: Do I need an adapter for aftermarket mirrors?
You may. Adapters are commonly required when the mirror and perch differ in:
Thread size
Thread pitch
Thread direction
Mounting style
Q: How do I identify Harley mirror hardware?
Many Harley-Davidson models use bolt-through mounting rather than standard metric perch threads. Some smaller Harley models, such as Street 500 and Street 750, are exceptions and use 5/16-inch threaded mirror mounts. Always confirm the exact model before ordering hardware.
Q: How high should a handlebar mirror sit?
High enough to clear your shoulders without forcing you to move your head dramatically. A good mirror position should feel natural and predictable, not exaggerated or awkward.
Q: Should I use threadlocker on motorcycle mirrors?
Only where the manufacturer specifies it. Too much threadlocker can make removal difficult, reduce adjustability, and increase the risk of thread damage.
Final Thoughts
Handlebar-mounted mirrors remain a practical and reliable choice for most motorcycles. The key to a successful upgrade is accurately identifying your mounting system and respecting the mechanical requirements of each design.
However, a stable, crystal-clear reflection depends on both a precise installation and the structural integrity of the mirror itself. If vibration or movement persists after following this guide, the issue may not be the installation—component quality is often a significant factor. While correct techniques can optimize any setup, high-performance reflections rely on internal construction designed to withstand road harmonics.
I’ve just received my set of KiWAV mirrors and they look awesome. This is the second set I’ve purchased, with the first set still going strong after nearly 10 years.
I’ve just received my set of KiWAV mirrors and they look awesome. This is the second set I’ve purchased, with the first set still going strong after nearly 10 years.
If I had to rate them, it would be 10 out of 10—and when you take the price into account, that’s another 10 out of 10.
Phillip
Thank You so Much for the mirrors, they fit perfectly. Please see the photos. They are High quality with no Vibration and can be fitted underslung, lengthways as pictured or reversed inside , so many... Read More
Thank You so Much for the mirrors, they fit perfectly. Please see the photos. They are High quality with no Vibration and can be fitted underslung, lengthways as pictured or reversed inside , so many options. Shipping was fast and they were packaged perfectly with attention and care . The nicest part of the deal was the wonderful letter that came with it from Marie C. Great product and Great Service. Many others on the internet are already asking where they came from, so...... Keep up the great work.
Andrew
First of all, Kuddos on the wrapping and the personal note, I buy a lot from amazon, and this is something from Etsy products, not amazon. It was a very nice touch.
Gonzalo
You’ll always have me as a customer, I do truly believe that your product is the best one that I have ever used, The quality is amazing, better than original equipment . All of You have always been... Read More
You’ll always have me as a customer, I do truly believe that your product is the best one that I have ever used, The quality is amazing, better than original equipment . All of You have always been kind to me, I have never been disappointed with the product and I let other riders know about your company and friends as well.
Steve
When I first saw your pricing, I was skeptical, but I had kind of a problem in that the handlebars on my 80 XS650 were a retro style that most mirrors did not fit well and the bike has a custom paint... Read More
When I first saw your pricing, I was skeptical, but I had kind of a problem in that the handlebars on my 80 XS650 were a retro style that most mirrors did not fit well and the bike has a custom paint job that I wanted to match.
Your mirrors were perfect and I think they look great!
Ken
Wow - you folks are doing a great job. And it's not just for show. The ribbon wrapping my package and the beautiful Shi character were fun to receive and I thank you. But mostly the quality of... Read More
Wow - you folks are doing a great job. And it's not just for show. The ribbon wrapping my package and the beautiful Shi character were fun to receive and I thank you. But mostly the quality of the headlight shell was the best. Some online reviewers of other company's shells pointed out that they were lumpy but yours is perfect!
Your enterprise deserves to thrive, and I hope it will. Thank you and best of luck
Van
Best thing since the drill press. Correct bar angle to your preference without buying new bars.
Clyde XXXXXX
I used this jig to drill a 2 inch long key way in my stainless steel propeller shaft, while my boat is in the water. Superb for that purpose. Got a nice and true line of drill holes. Then, I used it... Read More
I used this jig to drill a 2 inch long key way in my stainless steel propeller shaft, while my boat is in the water. Superb for that purpose. Got a nice and true line of drill holes. Then, I used it as a shaft clamp to create resistance on the shaft, so that I could pull my shaft coupling back down the shaft to set it in the right location. Let me tell you, this thing doesn't move once you lock it down. This is one awesome jib. It should be in the industrial category. All metal. Super strong. One of the nicest pieces of engineering I've see in years. And for the price? It's worth many times more than it costs. Don't think twice about picking this jig up if you need to drill a hole in a round piece of metal, even stainless steel. You will not be disappointed (assuming you're using the right bit & cutting oil). Wish I could kiss the guy who thought it up.
Ripley XXXX
As always it was a pleasure to buy from a very good, trustworthy seller! Thank you and thank you for the special personal note included in the package! The item looks stunning!!
Wynand
You provided an excellent experience!
Dale Allison
Dear Marie, the only suggestion I can tell is that:
Keep up the good work!! Your products are far better than other italian brands!!!
thank you again!!!
Ioannis Solidakis
Behind every engineering disaster are people like you waiting to fix the problem! Thank you for the mirrors they are good looking and I feel a whole lot safer now! The stock mirrors only showed me... Read More
Behind every engineering disaster are people like you waiting to fix the problem! Thank you for the mirrors they are good looking and I feel a whole lot safer now! The stock mirrors only showed me shoulders. And your mirrors show me the road!
Awesome product! Will definitely keep you guys in mind for every after market part I need.
Orlando
The whole experience was incredible, especially the hand written note that came with the product. Very special! Keep up the good work - looking forward to may next order.
Tony Esposito
The mirrors I bought for a custom project are just amazing. At fist I wasn't certain if I was fond of the design. I thought that the profile of the arm was kind of weird looking in photosI When I... Read More
The mirrors I bought for a custom project are just amazing. At fist I wasn't certain if I was fond of the design. I thought that the profile of the arm was kind of weird looking in photosI When I received the mirrors, I couldn't believe how nice they were. The arm profile actually is a great design, the geometry of the mirror itself is kick ass, the tinted mirror glass is super cool, and the gradient of blue to black was a really nice touch. The fact that you guys covered all mount bolt variables is a nice touch that anyone buying there will appreciate. The only thing I bet you can do better is to offer more colors, as with the Viper series. I only wish I could've had the vintage control lever set in this color blue. Those are pretty amazing bits of design work too-- and I'm sure they are worth the price. Best to you-- BD
Benjamin Miller
Love the turn signal mirrors, do exactly as advertised, would like to see them also work as running lights as well having the progressive turn signal flashing
John Schwartz
日本での販売展開に期待しています
Mr.山内
Great products and quality
Igor Ivanov
great quality, easy install, good hardware & fast shipping
Jay Livingstone
No concerns. Extremely happy with your product and service.
Michael Gaines
Pro product, best service. I'm very impressive your company letter.
Hoang TranTu
Good product, very well packaged with reasonable shipping costs, happy with my purchase thank you!
Daniel Maas
Fast service. Great quality of mirrors. No hassles.
Grant Bewert
GREAT price, great product, FAST shipping!
Robert Rider
Great product, much better than stock mirrors. I can now see the whole road behind me!!! THANKS...
Paul Richmond
Love this company. I accidentally ordered the wrong part and they went above and beyond to make sure i could exchange it for the right part. I would definitely order from here again.
Randi Garcia
merci pour tout vous avez d'excellent produit bravo
Gilles St Gelais
Keep up the quality and price, well done.
Shay Donaghey
It was a very good buy , looks perfect on my moto.
Trusted worldwide since 2010 KiWAV has served motorcycle riders through our official store and major online marketplaces for over 15 years, with long-term seller history, tens of thousands of items sold, and consistently positive customer feedback. Today, KiWAVMotors.com is our official store for direct product support, fitment guidance, warranty help, and worldwide shipping.
KiWAV Motors is a Taiwan-based motorcycle mirror manufacturer with three generations of mirror experience. We specialize in designing and manufacturing motorcycle mirrors for riders worldwide, including bar-end mirrors, OEM replacement mirrors, sportbike mirrors, cruiser mirrors, LED mirrors, TPMS mirrors, and advanced BSD (Blind Spot Detection) motorcycle mirrors.
Our focus is simple: helping riders achieve clearer rear visibility, greater riding confidence, and better everyday safety through well-designed mirrors. Every product is developed with attention to visibility, stability, adjustability, durability, and real-world riding performance.
From minimalist bar-end mirrors and OEM-style replacements to integrated turn-signal mirrors, TPMS mirrors, and next-generation BSD safety mirrors, KiWAV combines practical engineering with decades of mirror expertise.