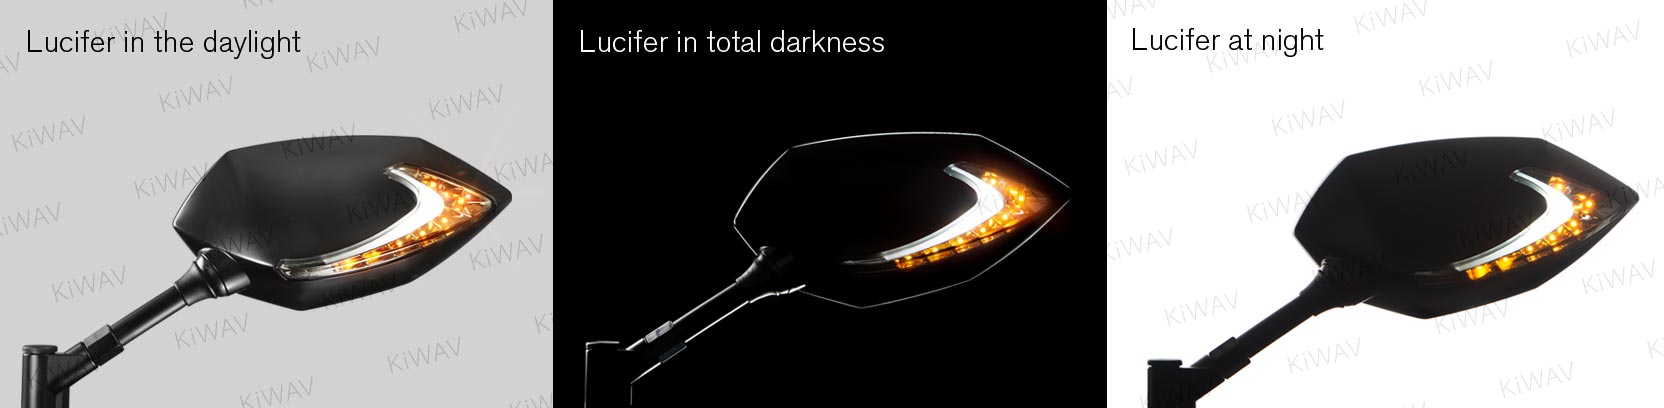
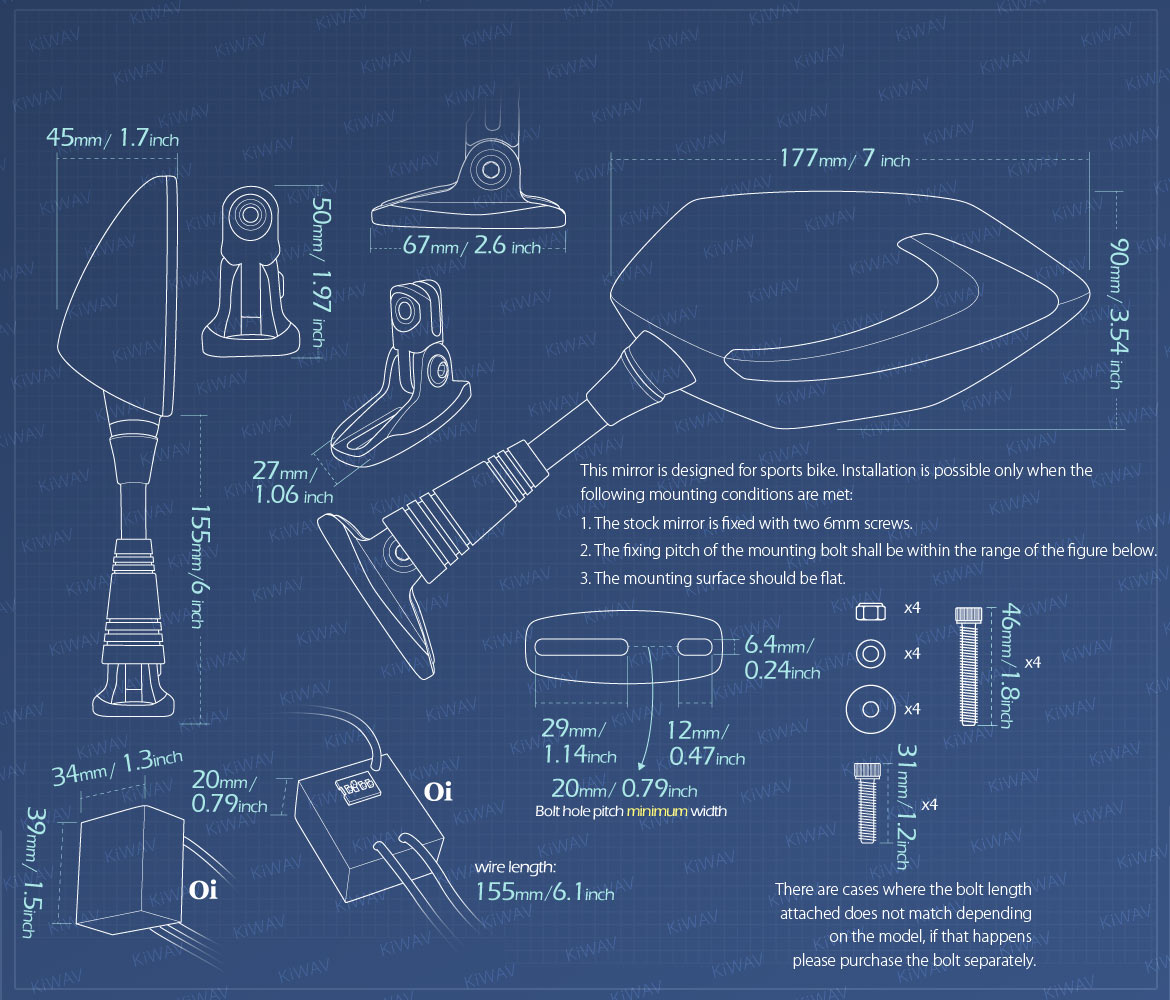
- Fitment
Suitable for hole spacings C2C on the fairing from 26 mm to 55 mm.
See the Fitment List
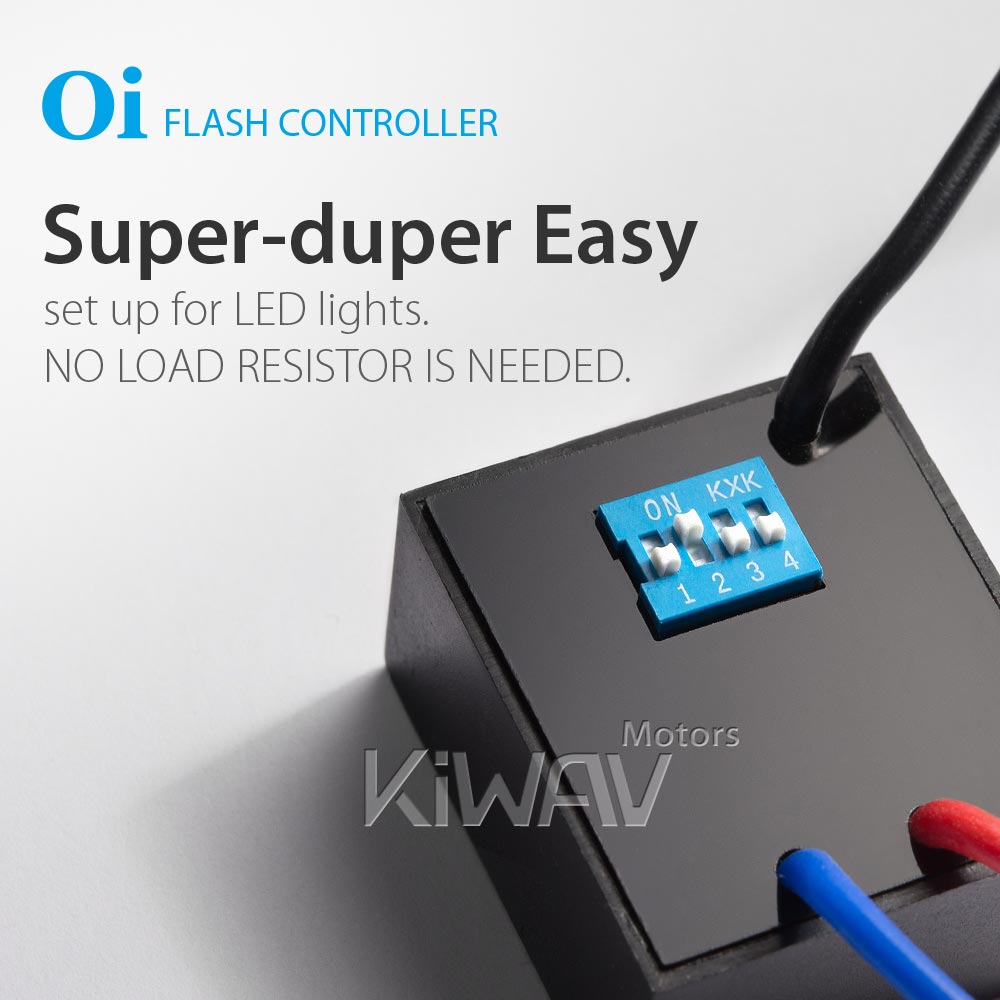
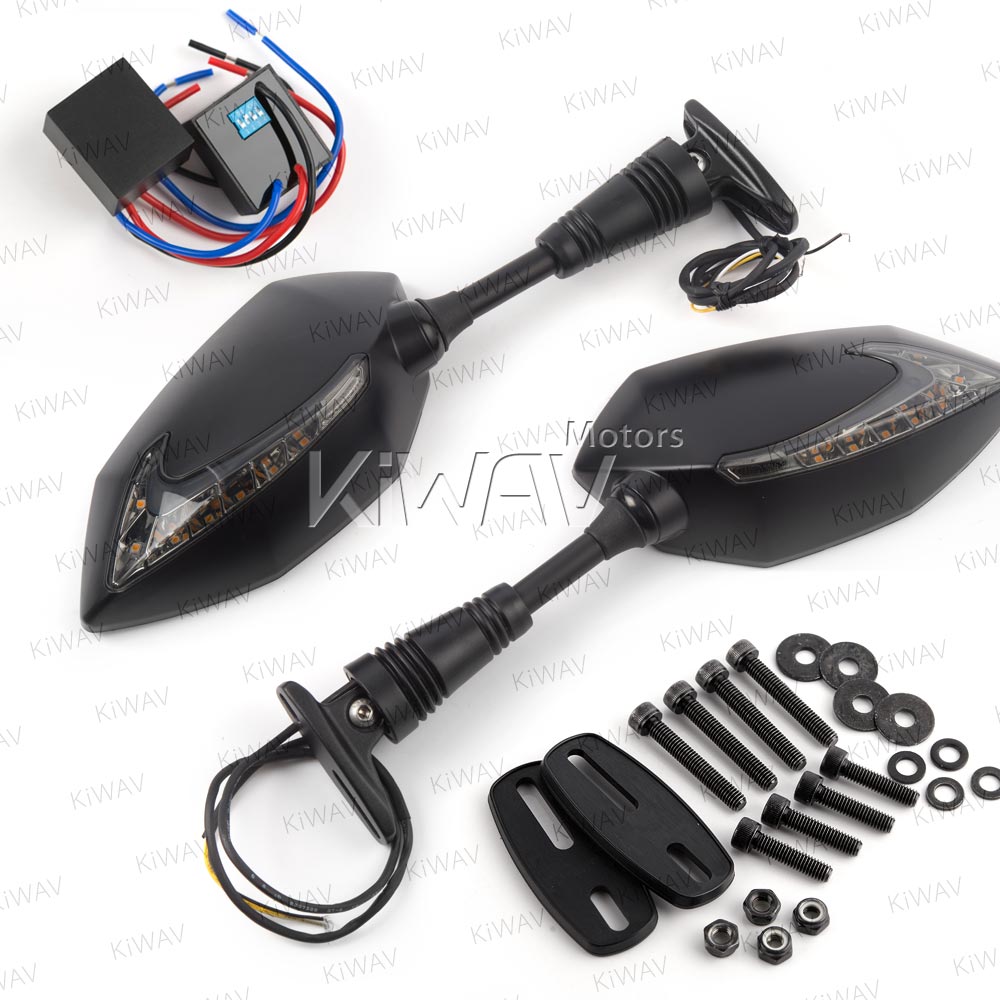
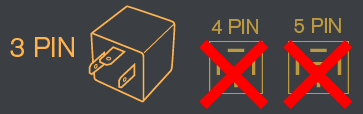
 Oi Flash Controller is designed to replace a 3-pin flasher relay ONLY (not for a 4 or 5 pin relay, it will destroy the device).
Installation
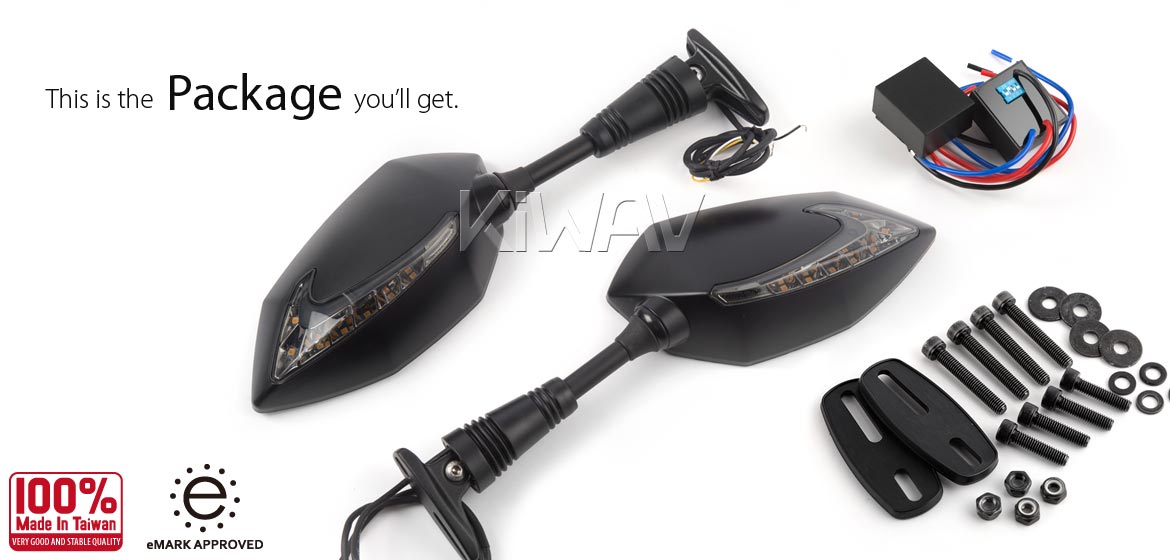
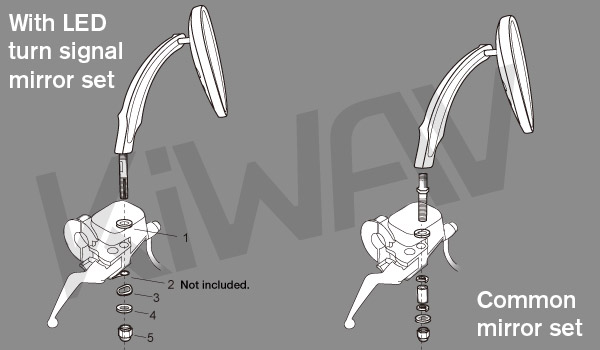
1. Please refer to your service manual to remove the original mirror.
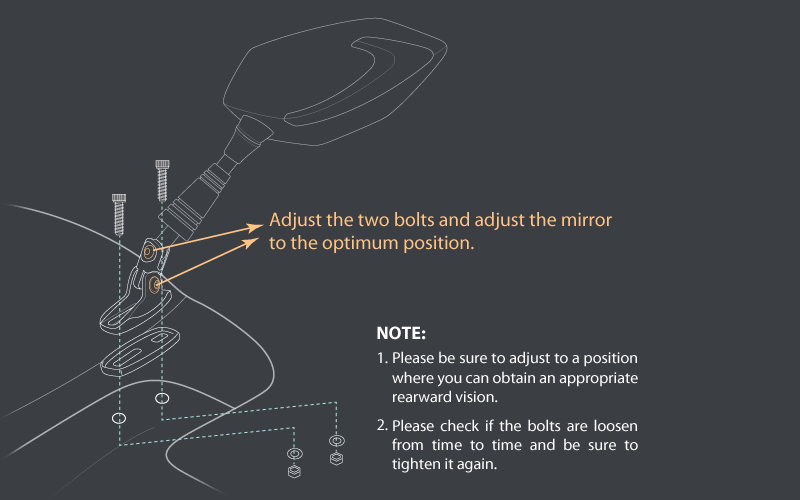
2. Temporarily fix the mirror to the bolt fixing position of the vehicle, using the base rubber, bolts (those with matching length or genuine one), washers and nuts. (See the figure below)
3. Once temporarily fixed to the left and right, please adjust the whole position using hexagon wrench at the two bolts at the bottom of the mirror.
4. Tightening each part after the position is finally fixed.
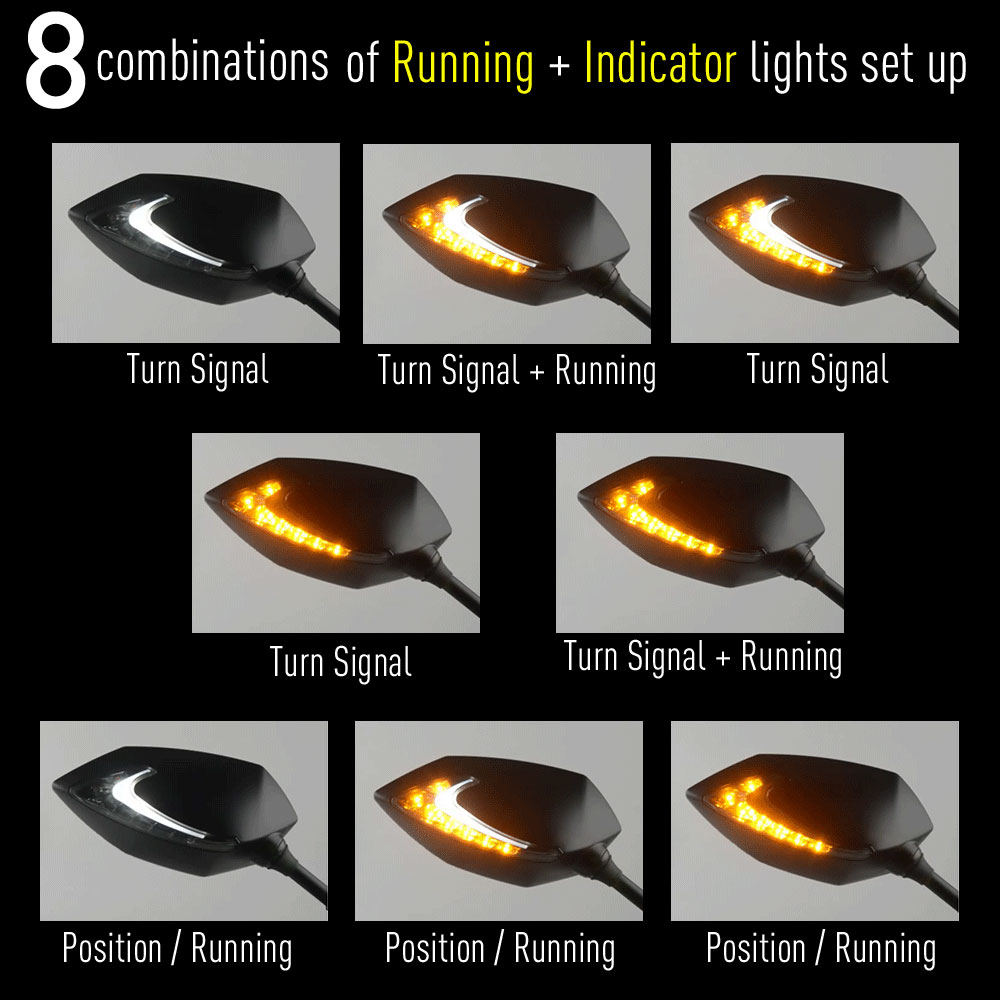
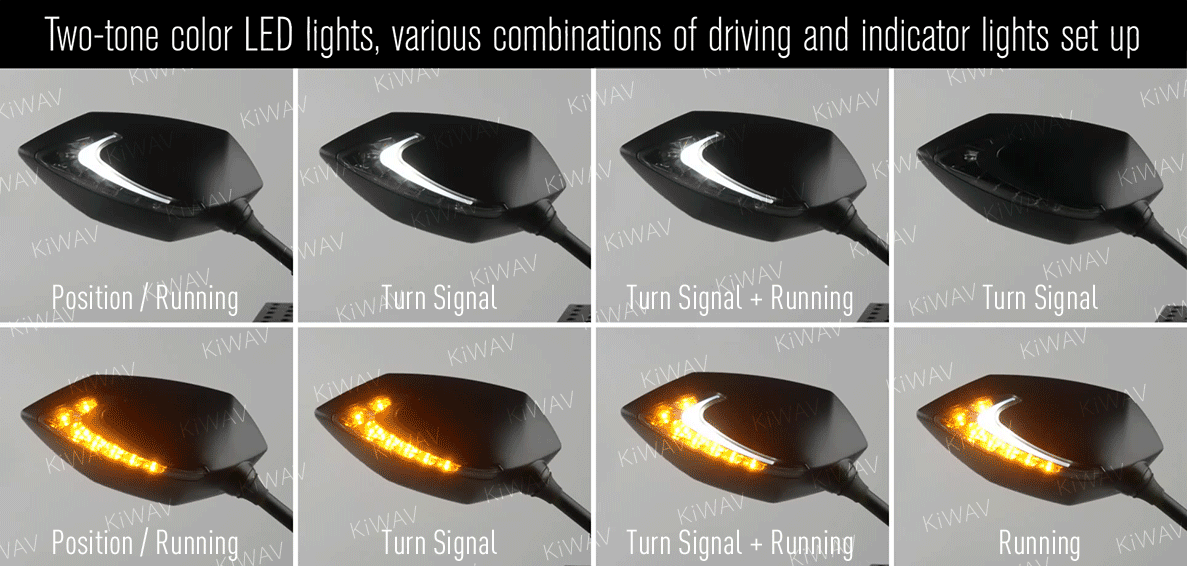
Connect to the Turn Signal
♦ There is no need to replace the relay when using this product with exisiting blinkers.
♦ Relay is needed when using this product as the only turn signal.
♦ Minor modification might be required depending on motorcycles.
Check the wiring of the vehicle on the manufacturer service manual, refer to the wiring table below, and connect the turn signal wiring with the attached electro tap.
Also, please wire the position line (white) of this product to the accessory power supply of each vehicle.
A table of this product and main manufacturer blinker wiring colors:
| Running Light (-) | Right Turn Signal (+) | Left Turn Signal (+) |
| Lucifer | black | yellow | yellow |
| Honda | green | light blue | orange |
Yamaha | black | deep green | brown | Suzuki | black / white | light green | black | Kawasaki | black / yellow | grey | green |
Each manufacturer wiring color in the table is for reference only, it depends on the vehicle year and specifications, please be sure to confirm with the service manual issued by the manufacturer and connect it.