


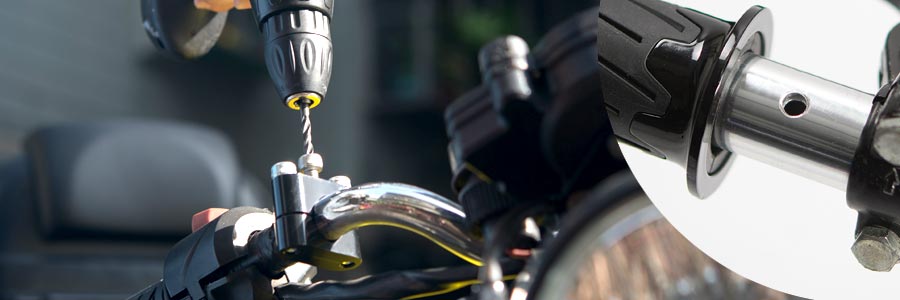
When replacing a motorcycle handlebar, some control assemblies use locating pins or tabs that fit into holes in the handlebar to prevent the controls from rotating.
If your motorcycle uses this type of setup and the replacement handlebar is not pre-drilled, you may need to drill new locating holes in the correct positions.
Quick answer: Drilling a clean, accurately positioned hole into a round handlebar can be difficult because the drill bit can wander across the curved surface. A V-block, securely mounted vise, center punch, or dedicated handlebar drill guide can help keep the bar and drill bit properly aligned.
Why Motorcycle Handlebars May Need Locating Holes
Many motorcycle switch housings and control assemblies use a small locating pin or tab that fits into a corresponding hole in the original handlebar.
This helps keep the control assembly from rotating once it is installed.
When fitting a replacement handlebar, first inspect the original bar and controls to determine whether locating holes are actually required. Some replacement handlebars are already drilled, while some motorcycle controls use a different method of securing the housing.
Do not drill a handlebar unless the motorcycle or control assembly requires it. Always check the motorcycle and handlebar manufacturer's instructions before modifying the bar.
Why Drilling a Round Handlebar Is Difficult
A motorcycle handlebar presents two common problems when drilling:
- The drill bit can wander. The curved surface makes it difficult for the bit to begin exactly where you marked the hole.
- The handlebar can move or rotate. If the bar is not securely supported, maintaining the correct drilling position becomes difficult.
A center-punch mark can help establish the starting point for the drill bit. A V-block or securely mounted bench vise can also help hold the handlebar in position.
Another option is a dedicated drill guide designed to clamp directly around the handlebar.
Using the KiWAV Motorcycle Handlebar Drill Guide
KiWAV Handlebar Drill Guide Tool
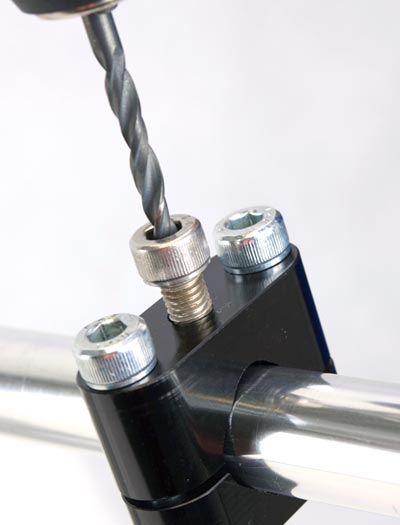
The KiWAV handlebar drill guide is a compact tool designed to help keep the drill bit positioned and aligned while drilling into the curved surface of a motorcycle handlebar.
Basic Procedure
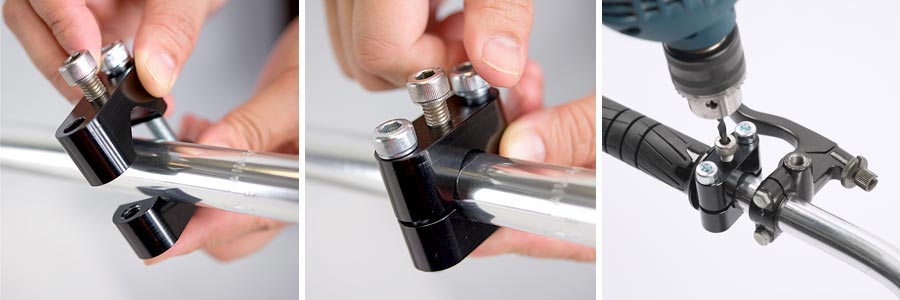
- Determine the correct hole position. Use the original handlebar and control assembly as references and mark the required location carefully.
- Position the drill guide over the mark.
- Clamp the guide securely and evenly using an Allen wrench.
- Recheck the position before drilling. Once the hole is drilled, its location cannot easily be corrected.
- Drill through the center guide opening using the appropriate drill bit for the required locating hole.
- Remove the guide and inspect the hole before installing the control assembly.
Important Before Drilling
- Confirm that the replacement handlebar actually requires a locating hole.
- Use the original handlebar and control assembly to verify the hole position.
- Make sure the handlebar is securely supported before drilling.
- Check that there are no internal wires, cables, or other components in the drilling area.
- Follow the handlebar manufacturer's instructions and restrictions before modifying the bar.
- Do not drill handlebars made from materials or designs that the manufacturer specifies must not be drilled.
Handlebar Drilling Video
Watch the KiWAV drill guide in use:
A drill guide can make this job easier by helping stabilize the drilling position on the curved handlebar surface, especially when working with a portable drill rather than a drill press.
Customer Reviews
Shop the KiWAV Handlebar Drill Guide Tool
Subscribe
Interested in practical motorcycle tools and workshop tips? Subscribe for new product and technical updates from KiWAV.